Before updating Oxygen or before the site migration process, be sure to clear the browser cache and server cache, disable the caching plugin and the caching system on the server.
- Create a backup (I usually use the built-in hosting capabilities, but you can use your favorite plugin for this purpose).
- Start the site upgrade or migration process (I usually use Duplicator Pro plugin, but All-in-one-WP migration is good too).
- After deploying the site to a new location, re save permalinks in WordPress settings:
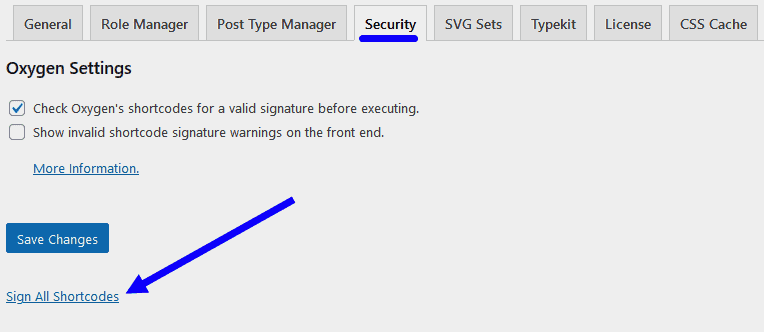
- Re-sign shortcodes in Oxygen settings:
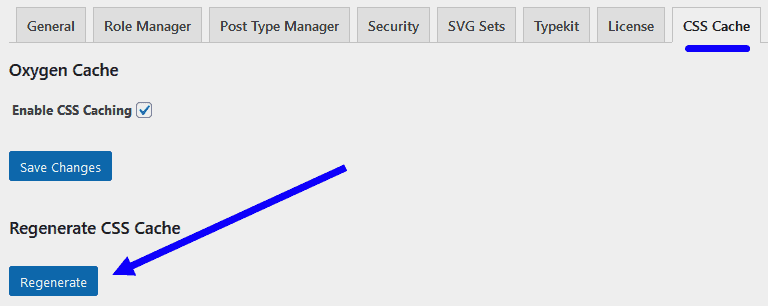
- Regenerate CSS Cache in Oxygen settings:
- Go to the list of Oxygen templates and save each (just save without any changes). This is a strange step, but often for me it was the last stage of a successful migration.
If, after completing all the steps, you still see a broken layout on the frontend, then try repeating steps 3 through 5. In rare cases, repeating these steps worked for me.
An important point: make sure the problem is not related to PHP memory limit on your server (check the settings on the server and increase the limit if necessary).
If after migrating the site you still have problems with incorrect URLs for images and files, then use the Better Search Replace plugin for bulk replacement.
If the above algorithm does not help, contact Oxygen support. When contacting support, explain the problem in detail and immediately provide access to the sites. You will usually get help within 10-48 hours.