
Design Custom Headers & Footers With This Free Elementor Plugin
Have you ever noticed that, when using a WordPress theme or page builder, you don’t have as much control over the header or footer as you would like? Sure, you can select from different alignment options and maybe embed a shopping cart icon or switch on search functionality, but is that enough? ?
When you’re in the business of building websites for clients, the last thing you want to do is give them a cookie cutter-looking website. You should do everything in your power to develop totally custom and impressive-looking designs for them. From top to bottom.
But to do that means altering the code in the header.php and footer.php files… and is that something you really want to mess around with? Wouldn’t it just be much easier if you could use the tools already at your disposal to give your WordPress sites unique headers and footers?
Thanks to Elementor and another handy plugin we’re about to discuss, you can!
HOW TO USE THE HEADER FOOTER ELEMENTOR PLUGIN FOR GREATER CUSTOMIZATION
There’s no denying how awesome it is to have WordPress themes available to speed up the website development and design processes. However, every WordPress theme comes with a limitation when it comes to the header and footer. It’s just how WordPress is built.
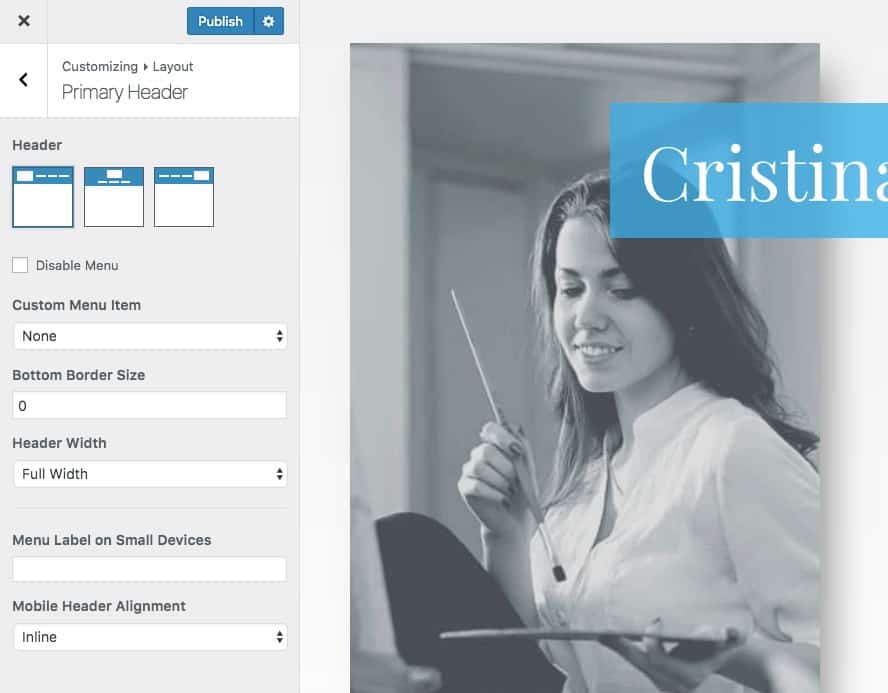
Most themes give users the options to choose the layout of the header:
They also offer the option to add different widgets to the footer along with additional informational bars:
If you want to create something custom here–especially if you want visitors’ first impressions of the site to be off the charts–then you have two options:
1. Create a child theme. Then edit the code in the header.php or footer.php files to build out your custom designs and layouts.
2. Use the Elementor page builder along with the Header Footer Elementor plugin and NavMenu Addon for Elementor plugin to simplify the whole thing.
Elementor Pro 2.0 will open up a number of additional widgets and capabilities. Design beautiful menu using Nav Menu widget and Header and Footer using theme builder.
Step-by-step illustration to achieve professional header and footer using all free resources :
1. ACTIVATE THE WORDPRESS PLUGINS
To start, make sure all the plugins you need for this are activated: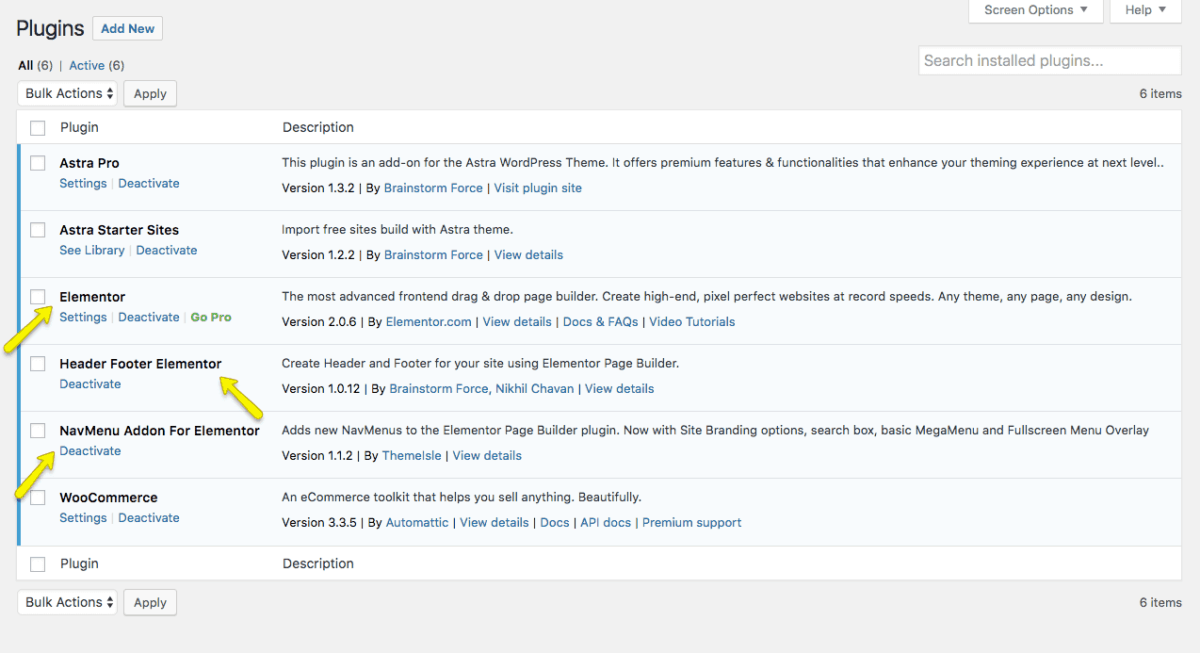
To clarify, you will need the three Elementor plugins from the screenshot above.
It’s important to note that, as of right now, the Header-Footer plugin isn’t universally compatible with all WordPress themes. Currently, if you use one of the following, you will be able to use this workflow to design custom headers and footers:
You can still create the custom header and footer content with other themes; however, it’s going to require a bit more work (which I’ll explain below). That said, if this custom content is really important to your clients, be sure to use one of the supported themes in order to streamline this process.
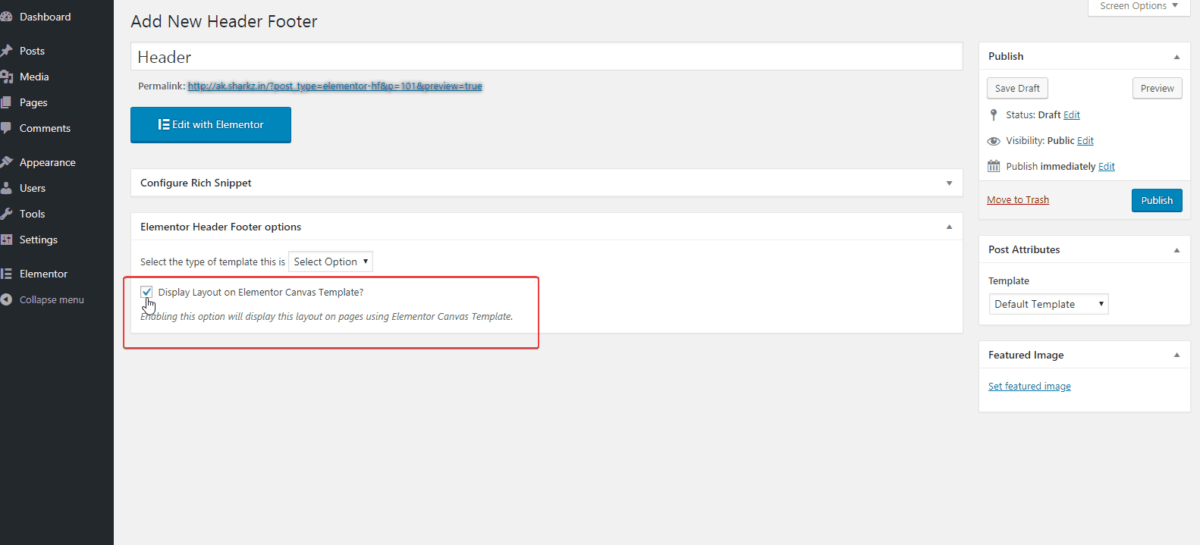
2. SET UP THE HEADER OR FOOTER TEMPLATE.
Under the Appearance menu in WordPress, click on Header Footer Builder.
Select Add New.
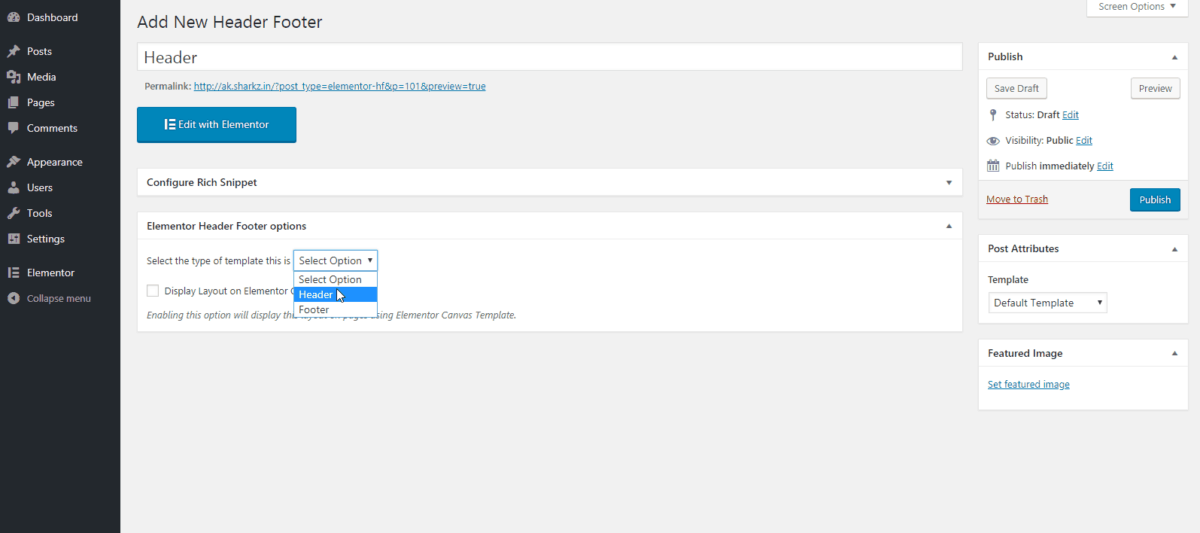
- Name the template.
- Choose whether you want to create a Header or Footer template.
- Check the box to add this template to the Elementor Canvas page attribute. This is required if you’re not using one of the themes mentioned above; otherwise, it’s not.
- Set the template to Elementor Canvas if you’re not using one of the supported themes. Otherwise, this isn’t necessary as the header or footer you’ve created will automatically appear on your pages.
- If you’d like to do away with the header or footer completely, check the boxes to do so.
Hit the Publish button when you’re done.
3. CREATE THE HEADER OR FOOTER TEMPLATE IN ELEMENTOR
Next, go to Edit with Elementor. From here, you can build your header or footer template from-scratch.
First, drag-and-drop the columns element into the interface on the right. Then set the number of columns you want to work with.
Once you have the framework established, fill in the remaining elements. Again, simply find them on the left and drag-and-drop them into place.
4. ADD THE NAVIGATION ELEMENT TO YOUR TEMPLATE
Something to note here is that the free Elementor plugin does not come with a menu widget. It makes sense when you think about the fact that it requires an add-on to even be able to create or edit the header in the first place. So, in order to add an actual navigation to your new header (or footer), you will need one more plugin:- NavMenu Addon for Elementor
Once the NavMenu Addon plugin is installed, it will open up a totally new set of header elements in Elementor:
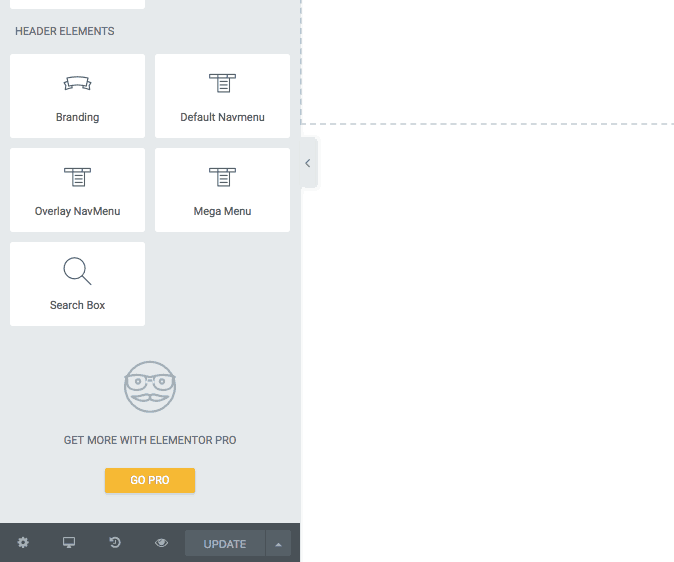
As with other elements in Elementor, all you need to do is drag-and-drop the preferred navigation element into the interface on the right. So long as you have a menu created under the Appearance > Menus tab in WordPress, your new menu will now populate within the template.
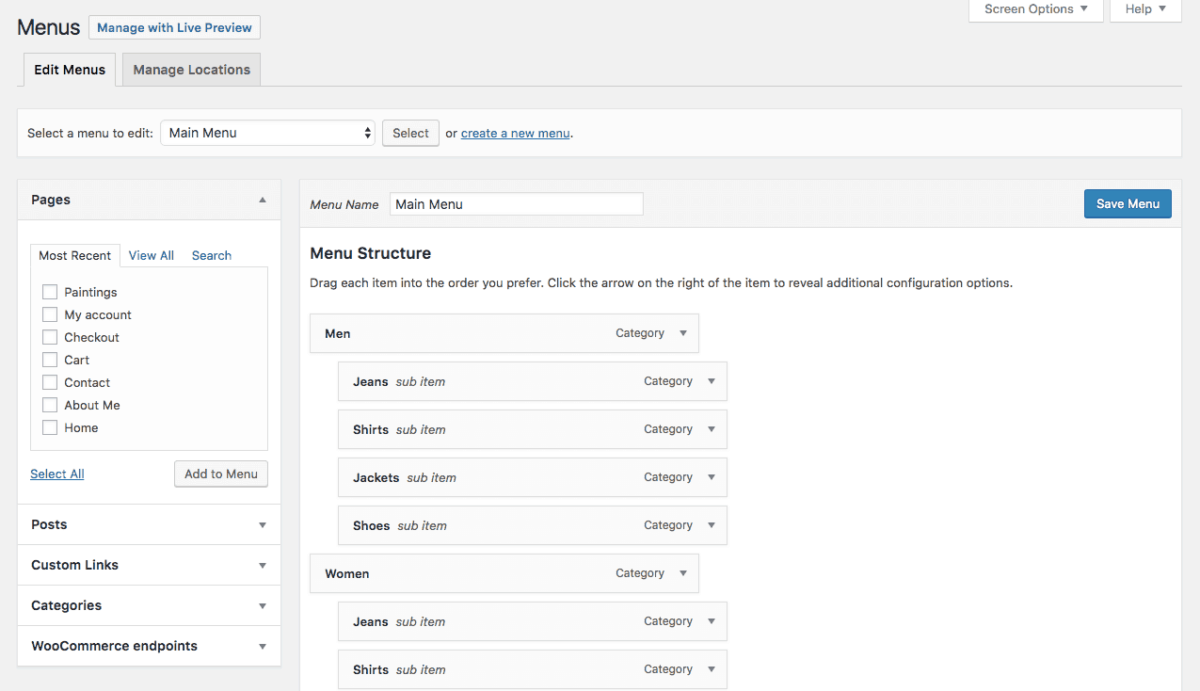
If not, return to WordPress and create a new one so you have a navigation bar to include in the template:
With your navigation set, your template finalized, and all the elements customized to your liking, click the Update button.
5. PAY ATTENTION TO RESPONSIVENESS
One more thing you will want to do here before returning to the WordPress dashboard is checking on the responsiveness of your new header element. As you know, mobile menus can’t really accommodate the horizontal, full width-spanning elements we use on a desktop. So, be sure to customize that before you move on.
You can design the mobile versions of your header and footer templates using the responsive switches at the bottom of the widgets menu: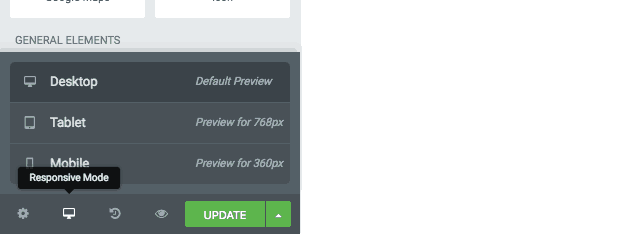
This will give you a look at how your new header or footer element will appear on tablets as well as smartphones. If you want to edit any of the elements for specific device screen sizes, look for the icons next to the elements:
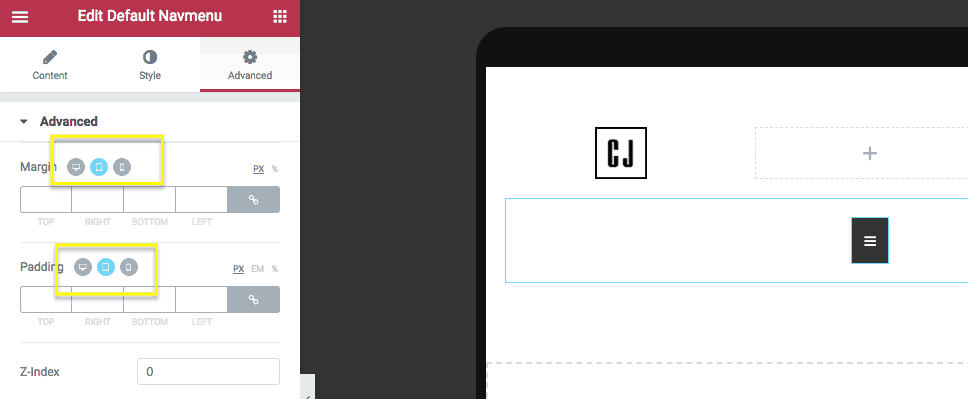
Toggle to the device you want to customize the setting for, apply the change, and then repeat for all other screen sizes. Click the Update button to save all your changes.
6. VERIFY THE DESIGN
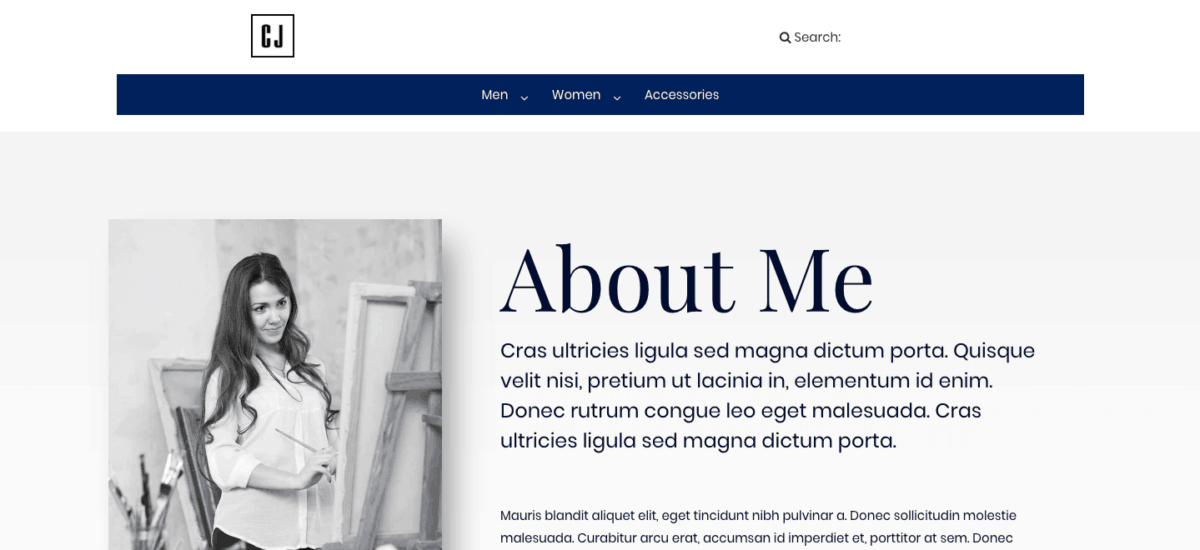
In Elementor, your template will now look something like this:
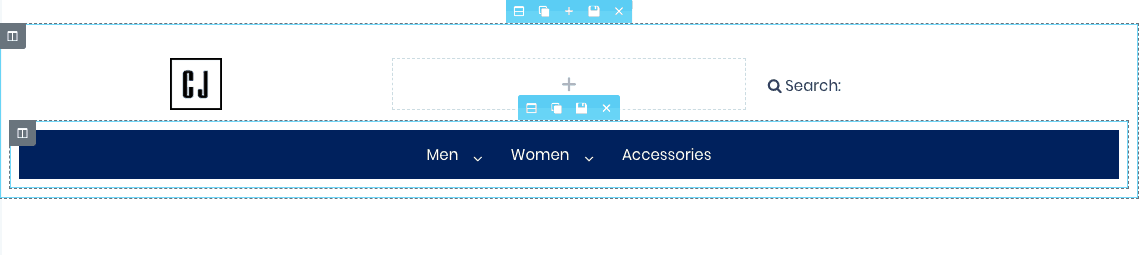
(Note: this is a rudimentary header mockup. We’re just including this example so you can see that it’s possible to erase the theme’s default settings and create your own.)
Return to WordPress, publish the changes to your site, and then hit the Preview button to ensure everything looks good on the front end of the site:

To apply this new header and/or footer you’ve created for the rest of your site, complete the final step.
7. APPLY THE TEMPLATE SITE-WIDE (OPTIONAL)
If you use one of the supported WordPress themes, then there’s less work for you to do here as your new custom header and footer elements automatically populate throughout the website upon publication. There actually isn’t a fourth step for you in that case (which is an even greater argument for using these themes).
However, if your client’s website happens to be stuck with a different theme and you still want to add a custom header or footer to it, here is what you need to know:
When you build a new page in WordPress, select the Elementor Canvas template if you’re using a non-supported theme.
When that box is checked, it gives you the ability to quickly add your template to the Elementor Canvas page attribute. By simply selecting that page attribute, your web page will now auto-populate with the header or footer template you’ve generated:
One other point to mention here is that non-supported themes may give you more trouble in the way of using this Header Footer Elementor plugin. For simpler sites, the above workaround will suffice. For more complex ones, however, it’s not always possible to switch to the Elementor Canvas template and import your new header or footer content.
For example, websites that have a blog or employ the use of custom post types won’t be able to use your custom designs. Instead, the default header from the theme will appear. That’s obviously not good as it will create an inconsistent experience for your visitor and perhaps even cause some confusion if they encounter a completely new element suddenly.
So, again, if you want to design custom headers and footers with Elementor, make sure you’re using one of the supported WordPress themes first.
Create Headers Using Elementor’s Theme Builder
The Header Template lets you easily design and edit custom WordPress headers.
- Under Templates > Theme Builder > Header > Add New, from the dropdown select Header and click Create Template.
- Choose a Header Block and Insert. Alternatively, you can design your own.
- Click the Section Settings
 > Layout > HTML Tag > Change Default to Header.
 - After you’ve finished designing, click Publish.
- Choose a Condition.
Create Footers Using Elementor’s Theme Builder
The Footer Template lets you easily design and edit custom footers.
- Under Templates > Theme Builder > Footer > Add New, select Footer from the dropdown and click Create Template.
- Choose a Footer Block and Insert. Alternatively, you can design your own.
- After you’ve finished designing, click Publish.
- Choose a Condition.