Chrome OS is Google’s lightweight operating system that you can only get if you buy a Chromebook that already has it installed. To be clear, you can’t install the same Chrome OS that Google installs (and allows other manufacturers to install) on a computer.
Chrome OS and Chromium OS
Chrome OS is based on Chromium OS. Chromium OS is an open source project that anyone (really) can copy, modify, and use in any way they like. That means you could get pretty close to a Chrome OS experience by installing Chromium OS on a computer. It does take some rather technical expertise, however.
If compiling your own operating system (See? It’s technical.) isn’t on your typical list of To Dos, software developer Neverware offers a much easier method. Neverware’s CloudReady is a version of Chromium OS that you can run on just about any computer. All you need is an 8 or 16GB USB flash drive, and you’re ready to go.
What is CloudReady?
CloudReady is an operating system that is based on Chromium OS, just like Google’s official Chrome OS. Both Neverware and Google take the base code from the Chromium OS open source project and add their own proprietary code to create a working operating system.
:max_bytes(150000):strip_icc():format(webp)/chromiumcloudreadychromeos-5b81fb8446e0fb0025dcc00f.jpg)
The advantage of CloudReady, in comparison to Chrome OS, is that you can install it on a wide variety of hardware. If you have an old Windows laptop or Macbook that has slowed down over time, you may be able to turn it into a very close approximation of a Chromebook by installing CloudReady.
Since CloudReady isn’t as resource-intensive as modern versions of Windows and MacOS, you may see a performance improvement if you install it on an older computer or laptop.
CloudReady isn’t compatible with all computer hardware. Before you install it on your computer, boot it from a USB drive and make sure that your mouse or touchpad, keyboard, Wi-Fi, and other devices all work.
How to Create a Chrome OS Installation on a USB Drive With CloudReady
Whether you want to install CloudReady on an old computer or laptop, or just take it for a spin, you need to start by creating a USB installer.
This process is a little different on Windows than it is on MacOS and Chrome OS and Neverware recommends that you use Windows for this step even if you aren’t planning on installing CloudReady on a Windows computer.
:max_bytes(150000):strip_icc():format(webp)/downloadchromeoscloudreadyinstaller-5b81df17c9e77c00505eaa24.gif)
If you have access to a Windows computer, the first step is to download the CloudReady USB maker from Neverware:
- Navigate to Neverware.com.
- Scroll down until you reach the Getting Started with CloudReady section.
- Click or tap on INSTALL HOME EDITION.
- Click or tap on DOWNLOAD USB MAKER.
Once you have downloaded the USB maker, you’re ready to create the USB installer. You will need an 8 or 16GB USB stick for this step. You will lose any data that’s stored on the USB stick, so back it up before you create your USB installer.
Neverware recommends that you don’t use SanDisk USB sticks, but if that’s all you have, it should work.
:max_bytes(150000):strip_icc():format(webp)/createchromeoscloudreadyusb-5b81dcfd46e0fb0082f1b7a8.gif)
Here’s how to create a USB installer for CloudReady:
- Launch the CloudReady USB maker program that you downloaded from Neverware.
- Click or tap Next.
- Select 64-bit or 32-bit, and click or tap Next.
- If you’re unsure, here’s how to tell if your Windows computer is 64- or 32-bit.
- Insert your USB stick and click or tap Next.
- Important: Do not proceed if you have any important data on your USB stick. Back up any important data first.
- Select the USB stick that you want to use, and click or tap Next.
- Wait for the installation to complete, and click or tap Finish.
Once you have finished making your CloudReady USB stick, you’re ready to try it out.
What if You Only Have a Mac Or Chromebook?
If you don’t have a Windows computer, you can still make a CloudReady USB installer. The process is a little more complicated, and Neverware recommends you use Windows instead, but it is possible.
:max_bytes(150000):strip_icc():format(webp)/installchromeosmacchromebook-5b81e6cbc9e77c00509f6137.gif)
The first step is to download a CloudReady image to place on your USB stick:
- Navigate to Neverware.com.
- Scroll down until you reach the Getting Started with CloudReady section.
- Click or tap on INSTALL HOME EDITION.
- Click or tap on DOWNLOAD 64-BIT or DOWNLOAD 32-BIT.
- Note: Use the 64-bit version unless you’re going to install CloudReady on an older 32-bit computer.
The next step requires you to have Chrome installed on your computer. This is a given if you’re using a Chromebook, but if you only have a Mac, and you don’t already have Chrome, you will need to install it before you proceed.
:max_bytes(150000):strip_icc():format(webp)/chromeosinstallermacchromebook-5b81e6a046e0fb0082f358f1.gif)
Once you have Chrome installed, you’ll need to open it and add the Chromebook recovery app:
- Launch Chrome.
- Navigate to the Chromebook Recovery Utility on the Google Play Store.
- Click or tap ADD TO CHROME.
- Click or tap Add app.
- Open the Chromebook Recovery Utility.
- Click or tap the gear icon.
- Click or tap Use local image.
- Select the CloudReady .iso that you downloaded from Neverware.
- Important: If you have a Mac, Neverware recommends that you unzip the .iso using the Unarchiver utility. If you don’t, the USB installer creation process may not work.
- Click or tap continue.
- Wait for the process to finish, and click or tap Done.
How to Run Chrome OS From a USB Drive
Once you have finished creating a CloudReady installation USB drive, you’re almost ready to go. The last thing you need to do is shut down the computer you want to use CloudReady on, and make sure that it is capable of booting from USB.
If you insert the USB stick in your computer, and it boots to its normal operating system, you will need to change the boot order. Check out our guide to changing boot order in BIOS if you are unsure how to accomplish this. On a Mac, just hold down the option key when booting up and you’ll be given a choice of which device to use to boot your Mac.
:max_bytes(150000):strip_icc():format(webp)/chromeoscloudreadybootfromusb-5b81f62ec9e77c002514612e.gif)
Here’s how to run Chrome OS from a USB stick via CloudReady:
- Select a computer that you want to use with CloudReady.
- Note: You can use a laptop, desktop, Windows, Mac, or even Linux computer. The hardware may not be perfectly compatible, but you won’t know until you try.
- Make sure the computer is off.
- Locate a USB port on the computer and insert your CloudReady installation USB.
- Turn the computer on.
- Note: If it boots to its normal operating system, you will need to change the boot order.
- Wait for the welcome screen to appear.
- Click Let’s go.
- Check your internet connection.
- If you aren’t connected to ethernet, plug in an ethernet cable, or click Add other Wi-Fi network.
- If adding a Wi-Fi network, click on your network, or enter the SSID and click Connect. Skip this step if you are connected via ethernet.
- Click Next.
- Click CONTINUE.
- Enter your Gmail address or email that’s associated with your Google account, and click Next.
- Note: If you don’t already have a Google account, click More options and follow the on-screen instructions.
- Enter your Gmail or Google account password, and click Next.
- If prompted, enter your two factor authentication code and click Next.
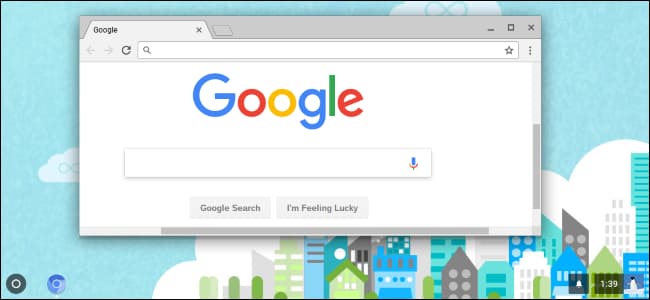
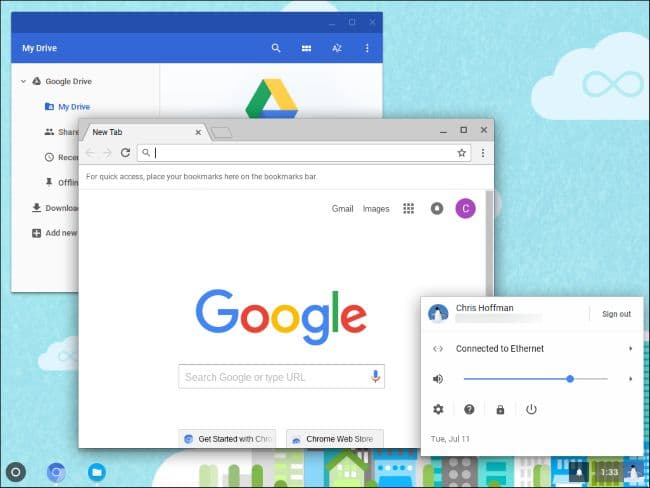
This will complete the setup of CloudReady. It’s ready to use in this state, and you can immediately start browsing the internet with Chrome, access your Google Drive files, and anything else you would normally do with a Chromebook.
If you don’t want to permanently replace your existing operating system with CloudReady, you can simply leave the USB stick in your computer. Every time you turn it on, it will boot to CloudReady instead of the original operating system. If you ever want to use the original operating system, just turn off the computer, remove the USB stick, and turn the computer back on.
If you don’t install CloudReady permanently, you will not receive updates. CloudReady receives regular, automatic updates from Neverware once it has been installed. You will need to periodically create a new CloudReady USB stick to take advantage of updates to the operating system if you choose to not permanently install it.
How to Install Chrome OS Via CloudReady
Installing CloudReady deletes your original operating system and all of the files on your computer. After you install it, your computer will have a version of Chrome OS on it instead of the original operating system. The rest of the data on the computer, including any images or videos you have saved, will also be gone.
:max_bytes(150000):strip_icc():format(webp)/installchromeoscloudready-5b81f65046e0fb0050f63b13.gif)
Before you install CloudReady permanently, you will need to back up all of your files to the cloud or an external hard drive. You should then boot up CloudReady using the method that was described in the previous section.
If your computer doesn’t operate normally when running CloudReady from the USB installer, permanently installing CloudReady won’t magically fix the problem. Make sure that all of your devices, including the keyboard, mouse or touchpad, Wi-Fi, and everything else functions normally.
CloudReady is compatible with most computers, but some hardware just isn’t compatible with ChromeOS or CloudReady. If you find that your computer won’t connect to Wi-Fi, CloudReady probably doesn’t have a working driver for your Wi-Fi card. In that case, permanently installing CloudReady would be a bad idea.
If CloudReady works well on your computer, installing it is extremely easy:
- Turn your computer on with the CloudReady USB stick already inserted.
- Wait for CloudReady to boot up.
- Click your user icon in the lower right corner of the system tray.
- Click Install CloudReady.
- Click INSTALL CLOUDREADY again.
- Read and agree to all warnings, and wait for the installation process to finish.
Once the installation process has finished, you can turn the computer off and remove the USB stick. When you turn the computer on the next time, it will boot into CloudReady.
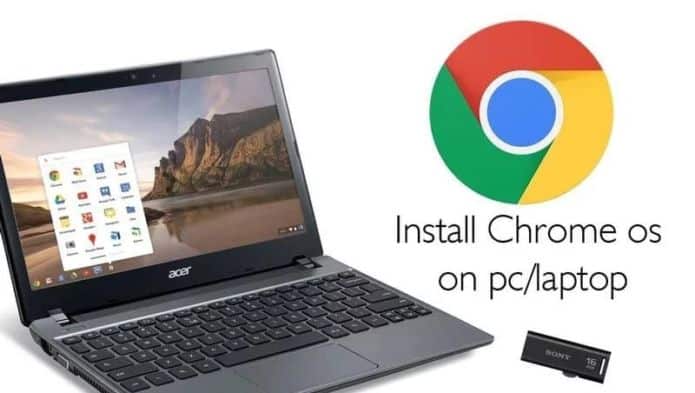
How to Install Chrome OS from a USB Drive and Run It on Any PC
Google only officially supports running Chrome OS on Chromebooks, but don’t let that stop you. You can put the open source version of Chrome OS on a USB drive and boot it on any computer without installing it, just like you’d run a Linux distribution from a USB drive.
If you just want to test Chrome OS, your best bet is running it in a virtual machine. This ensures that you won’t run into any hardware-related issues. But this method lets you take your Chrome OS installation wherever you go and use it on other computers, which is kind of neat.
What You Need to Know
RELATED: The Best Chromebooks You Can Buy, 2017 Edition
Google doesn’t officially offer Chrome OS on anything but Chromebooks. However, like Chrome, Chrome OS is based on an open source project named Chromium OS.
A company named Neverware takes this open source code and creates a product called Neverware CloudReady. It’s basically just Chromium OS plus some additional management features, and Neverware sells it to schools and businesses who want to run Chrome OS on their existing hardware. However, Neverware also offers a home version of CloudReady for free. It’s basically just the open source version of Chrome OS with some additional hardware support and the ability to run on almost any PC, rather than just Chromebooks.
Some additional features, like support for Android apps, are not available on Chromium OS. You may also run into issues with websites that use certain multimedia or DRM features. This isn’t quite the same experience you’ll get on a Chromebook.
Neverware offers a list of officially supported devices that have been certified to run with CloudReady. It doesn’t matter if your computer doesn’t appear on this list—there’s a good chance it will work alright, too.
How to Put Neverware CloudReady on a USB Drive
You’ll need a USB drive that’s either 8GB or 16GB in size for this. It can’t be any larger or smaller, according to Neverware.
Download the free CloudReady Home Edition from Neverware’s website. The 64-bit version should work on most computers, although much older computers will only support the 32-bit version. If you’re not sure which to use, just go with the 64-bit edition.
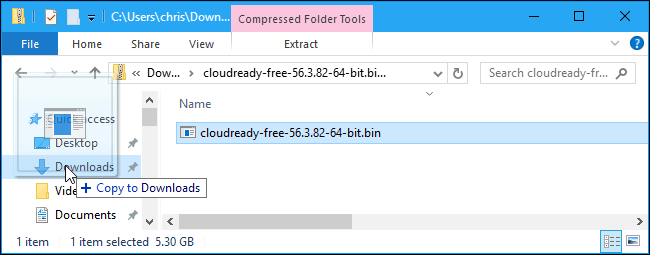
Extract the downloaded .bin file from the .zip file. On Windows, you can just double-click the .zip file to open it, and then drag-and-drop the .bin file inside it to another folder.
Next, install the Chromebook Recovery Utility in Chrome on a Windows PC, Mac, or Chromebook you have access to. This official Google-provided utility will create your bootable USB drive.
Launch the Chromebook Recovery Utility app once it’s installed. It will appear in your Start menu and on the chrome://apps page in Chrome.
Click the gear icon at the top right corner of the Chromebook Recovery Utility window and select “Use local image”.
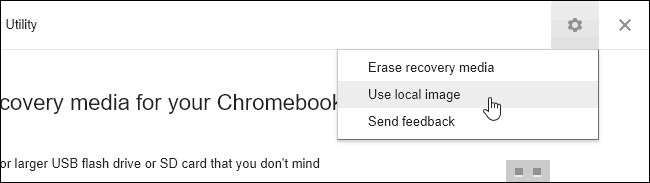
Navigate to the CloudReady .bin file you just downloaded and extracted.
When prompted, insert the USB drive you’ve chosen to use into your computer and select it in the box that appears.
Warning: The contents of the USB drive will be erased. Be sure you’ve backed up any important files first.
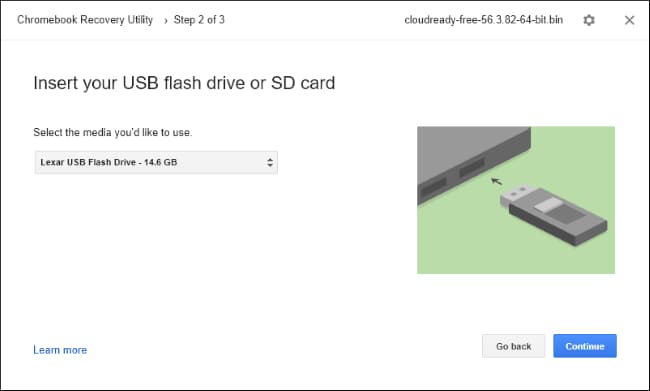
Click through the utility and click “Create Now” to create your bootable USB drive. When it’s done, you’ll see a message saying your recovery media is ready. This means your bootable Neverware CloudReady USB drive is now ready to use.
The resulting USB drive can be used on any computer, so you can take it with you and boot it wherever you like.

How to Boot Your USB Drive and Use Chrome OS
RELATED: How to Boot Your Computer From a Disc or USB Drive
You can now boot from the USB drive like you’d boot from any other removable devices. In a simple scenario, you may just need to insert the USB drive into a computer, restart the computer, and it will boot from the USB drive. In other scenarios, you may need to modify your boot order or use a boot menu to select the USB drive. On newer PCs that come with Secure Boot enabled, you may need to disable Secure Boot to boot Neverware CloudReady.
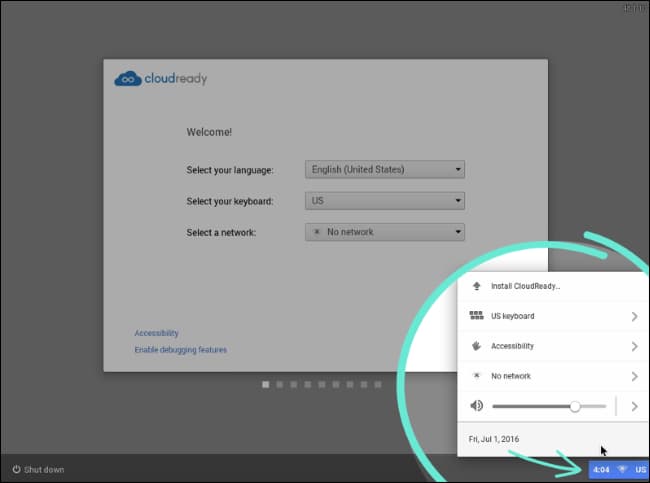
When it boots up, you’ll see the usual Chrome OS welcome screen branded with a “CloudReady” logo. Select your language and network to continue.
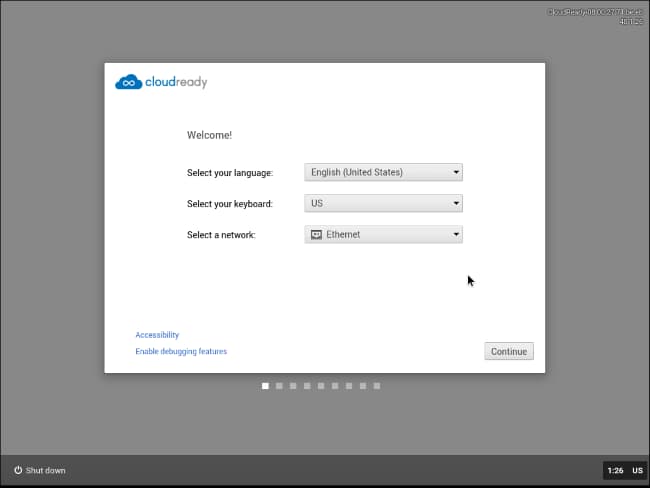
After you do, you’ll be presented with the Chrome OS sign-in screen where you can sign in with a Google account, and you’ll get access to the Chrome OS desktop afterwards. Feel free to use it all you like an, when you’re done, just shut the computer down and pull the USB drive.
Note that, while you will get updates to Neverware CloudReady if you install it on your computer, the operating system won’t update itself if you install it on a USB drive. If you want to update your Neverware CloudReady USB drive to the version with the latest Chromium OS code in the future, you’ll need to repeat the above process, downloading the latest image from the Neverware website and using the Chromebook Recovery Utility to copy it to your USB drive.
If you actually wanted to install Neverware CloudReady on your computer instead of using it in a live USB environment, you’d click the tray at the bottom right corner of the screen and select “Install CloudReady”. However, this is only necessary if you want to install the operating system to your computer—you can use CloudReady all you like from the USB drive.
Consult the official Neverware CloudReady installation guide for more detailed information, if you need it.