Oxygen’s visual interface provides controls for many CSS properties, but sometimes you may want to add additional, custom CSS that can’t be created with Oxygen’s visual controls.
When writing custom CSS, Oxygen displays the result right inside the editor.
ADDING CSS PROPERTIES TO AN ELEMENT OR CLASS
When editing an element or class, you may specify any additional CSS properties that Oxygen doesn’t provide visual controls for. Click Advanced > Custom CSS and add CSS properties you need.
ADDING CUSTOM CSS TO A PAGE OR TEMPLATE
Additional CSS can be added to a page or template using the Code Block element, which can be added from +Add -> Basics -> Code Block
ADDING SITEWIDE CSS
Stylesheets that will be loaded on every page of your site can be added from Manage -> Stylesheets.
TIPP – Besonders beim Animista Kenburns-Effekt für Backgrund wichtig:
- Die Höhe eines HTML-Blocks mit CSS height ist hingegen nur ein Anfangswert!
Wenn der Inhalt für das umfassende Element zu groß ist, fließt er weiter, auch wenn die Höhe der Box als CSS-Eigenschaft height angegeben ist. Das Überfließen kann nur durch CSS overflow verhindert werden, wobei übergroße Inhalte nicht mehr angezeigt werden. - Oxygen-Layout des Background-DIVS > Layout > Overflow > HIDDEN
CSS-Effekte von theAppGuruz.com
https://www.theappguruz.com/tag-tools/web/CSSAnimations/
Animation komplett kopieren und in einen CodeBlock oder in ein Stylesheet eintragen. Einen dauerhaften Effekt erzeugt man mit dem Eintrag
-webkit-animation-iteration-count: infinite;
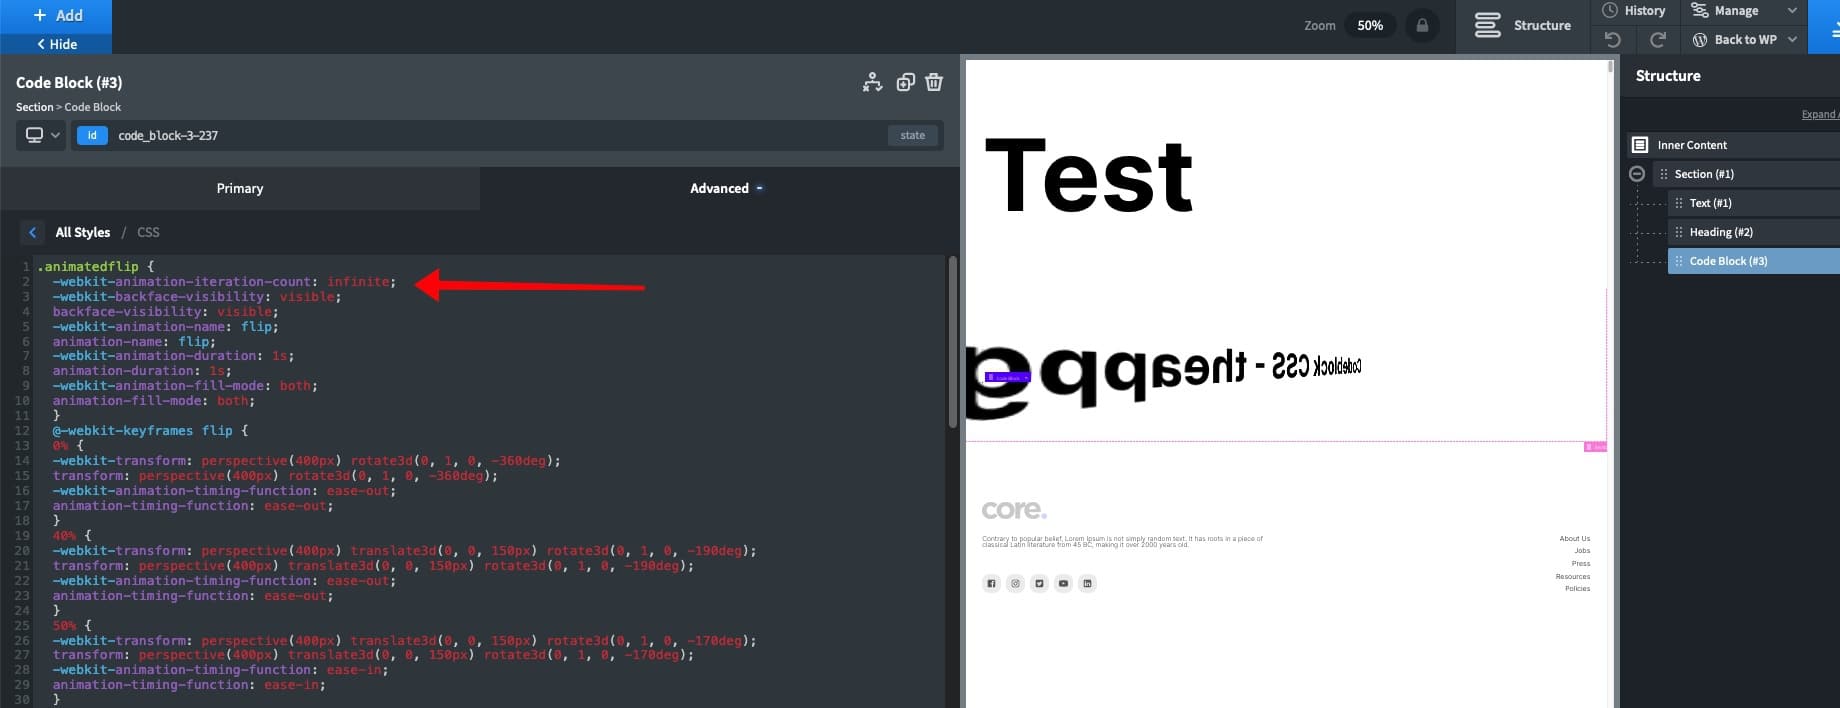
Nicht vergessen den PHP-Code auszukommentieren:
<!-- -->
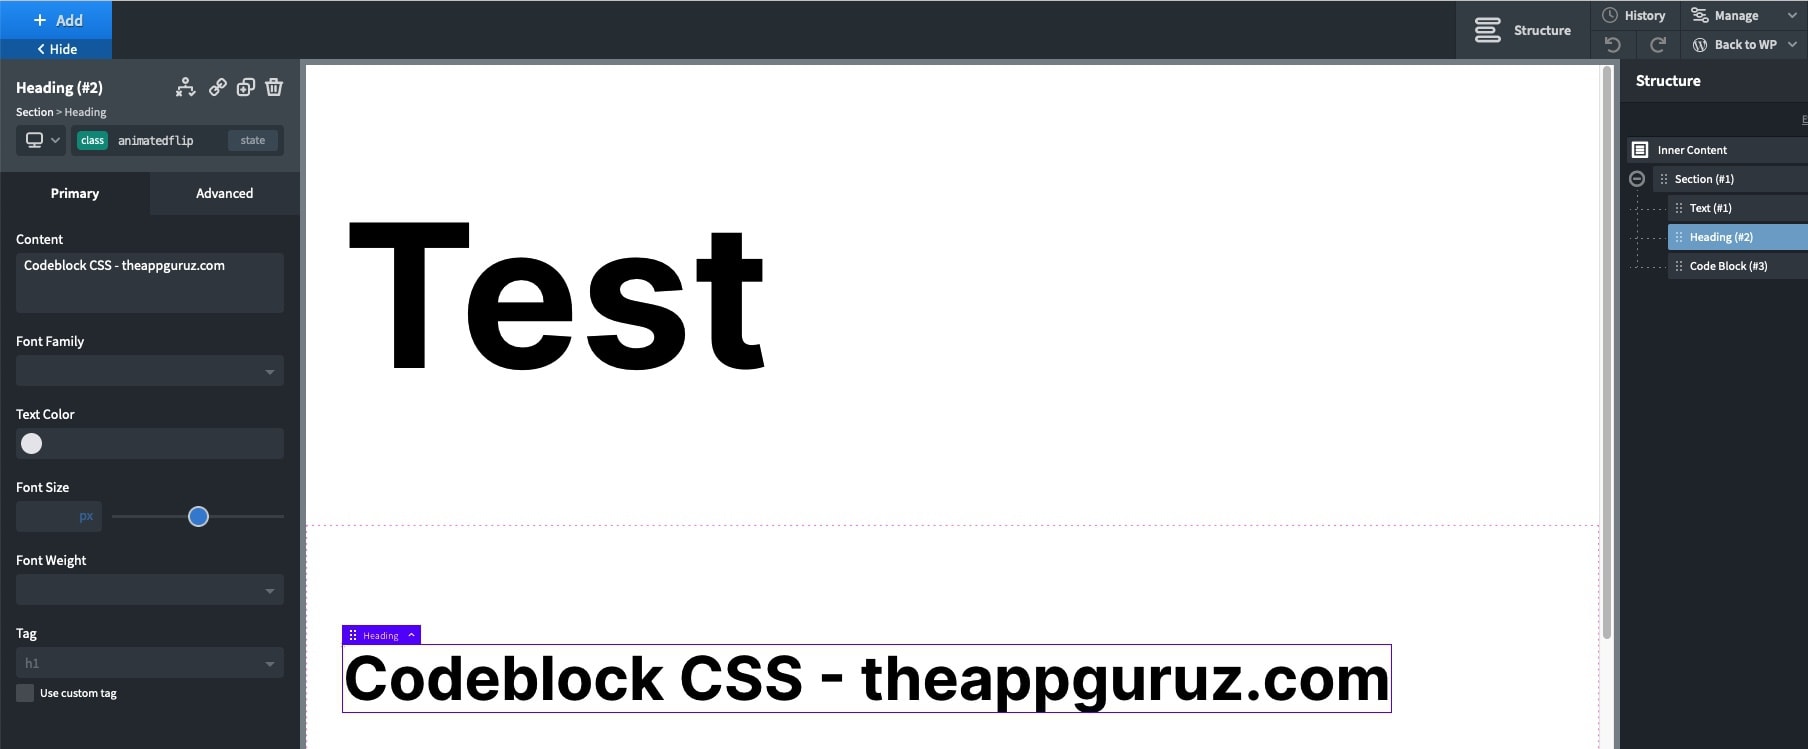
Um den Code anzuwenden das entsprechende Element auswählen und über add class… den Namen des CSS-Effekts eintragen.
Der Name darf keine Sonderzeichen enthalten, also ggf. den Code von appguruz umbenennen. In diesem Beispiel habe ich „animated.flip“ in „animatedflip“ umbenannt.
Windows Programm Animatorify
Class und gleich darauf den Code für die Keyframes in den Codeblock / Stylesheet einfügen. Der Rest ist wie oben beschrieben.
Weitere CSS Generatoren
Genial: https://animista.net/
Voller Umfang: https://webcode.tools/generators/css
https://angrytools.com/css/animation/
Animate elements when scrolled into view with native JavaScript
In this tutorial, you’ll learn how to animate elements as they are scrolled into view using native JavaScript and CSS.
Note: this approach assumes the user has JavaScript enabled.
There are two steps to animating on scroll:
- Creating the CSS animation
- Applying the animation when an element is scrolled into view
Creating the animation
For the animation you can use the animation CSS property. animation applies an animation between CSS styles. For example, animating an element from opacity 0 to opacity 1.
The following fade-in animation fades an element in and makes it appear to grow:
@keyframes fade-in {
    from {opacity: 0; transform: scale(.7,.7)}
    to {opacity: 1;}
}
.fade-in-element {
  animation: fade-in 1.4s;
}
All elements with the class fade-in-element will fade in once the page is loaded. This is great for elements that are in the viewport initially, but it means users won’t see the animation for elements that aren’t.
The solution is to add the class fade-in-element to elements as they appear in the viewport during a scroll. You can do this with JavaScript.
Before elements have the fade-in-element class, they will have full opacity. This will look glitchy as the element jumps from 1 to 0 opacity without a transition, so you need to set the opacity of these elements to 0:
.hidden {
  opacity: 0;
}
You should add the hidden class to each element you want to animate.
The next step is to remove the hidden class and add a fade-in-element class when an element scrolls into view.
Applying the animation
You need to apply the animation when an element is scrolled into view.
The following JavaScript calls init to build a NodeList (elements) of elements with the hidden class.
It then calls checkPosition to loop through the elements and calculate whether they are visible. If an element is visible, checkPosition removes the hidden class and adds the fade-in-element class.
The code adds checkPosition as a scroll event listener, and init as a resize event listener.
(function() {
  var elements;
  var windowHeight;

  function init() {
    elements = document.querySelectorAll('.hidden');
    windowHeight = window.innerHeight;
  }

  function checkPosition() {
    for (var i = 0; i < elements.length; i++) {
      var element = elements[i];
      var positionFromTop = elements[i].getBoundingClientRect().top;

      if (positionFromTop - windowHeight <= 0) {
        element.classList.add('fade-in-element');
        element.classList.remove('hidden');
      }
    }
  }

  window.addEventListener('scroll', checkPosition);
  window.addEventListener('resize', init);

  init();
  checkPosition();
})();
And that’s how you animate elements when scrolled into view with native JS.
You can edit the animate classes to create all kinds of cool effects, give it a go!
Bei mehreren, unterschiedlichen Animationen muss man verschiedene hidden-Klassen anlegen und im JS eintragen.
(function() {var elements;var windowHeight;
function init() {elements = document.querySelectorAll('.hidden-fadeInLeft');elements = document.querySelectorAll('.hidden-fade-in-right');elements = document.querySelectorAll('.hidden-animatedflip');windowHeight = window.innerHeight;}
function checkPosition() {for (var i = 0; i < elements.length; i++) {var element = elements[i];var positionFromTop = elements[i].getBoundingClientRect().top;
if (positionFromTop - windowHeight <= 0) {element.classList.add('fadeInLeft');element.classList.add('fade-in-right');element.classList.add('animated-flip');element.classList.remove('hidden-fadeInLeft');element.classList.remove('hidden-fade-in-right');element.classList.remove('hidden-animatedflip');}}}
window.addEventListener('scroll', checkPosition);window.addEventListener('resize', init);
init();checkPosition();})();