Between web apps and Android apps in Chrome OS, there’s a lot you can get done on Chromebooks. However, there still might be certain things about Windows you miss.
You might not have thought it was possible, but you have a few different options for bringing some of that Windows goodness to your Chrome OS machine. There are a multitude of ways to make this work — and we can show you where to go. Here’s how to use Windows on a Chromebook!
Before you begin
Before setting off on this adventure, there are a few important caveats to getting Windows up and running on your Chromebook. Most importantly, messing with your operating system, firmware, and BIOS can have serious effects on your system. You’ll want to back up any important data away from your computer before you begin.
If something does happen and you find yourself unable to use your Chromebook, you can create a USB drive from another computer to try and recover the system. This will erase all of your data though, so make sure to back up anything that isn’t saved to Google Drive.
With that out of the way, let’s begin with the first (and easiest) method.
Method 1: Free Online Apps
If you are primarily interested in accessing apps from the Office suite and don’t really care about any of the other apps offered on Windows 10, this is by far the easiest option and you can do right from the Chrome browser.
Step 1: Launch the Chrome browser and navigate to this Microsoft site.
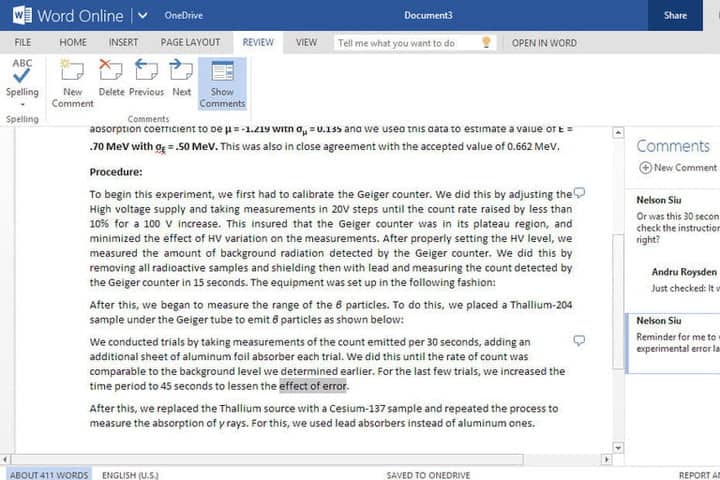
Step 2: Here you will see the selection of apps available for Office Online. Basically, Microsoft knows that certain core apps are very important for professionals and students, so they want people to be able to access them from any operating system. This is why they put up free online apps for options like Word, Excel, PowerPoint, Sway, Mail, Calendar, OneDrive, and more.
Step 3: Select the app or apps that you want to use. A version will open in your Chrome browser and you will be able to start using it. Take note that these online versions won’t have all the capabilities that you would get with something like Office 365. However, they should work for most purposes.
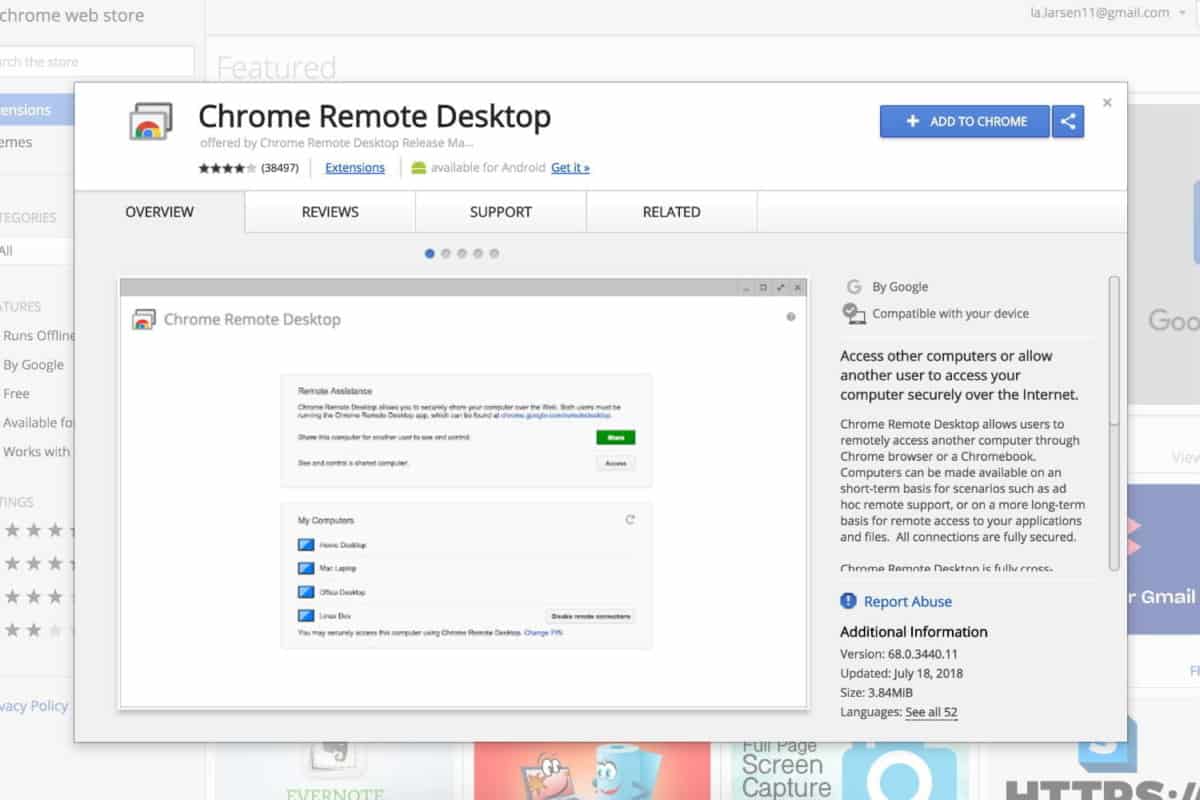
Method 2: Chrome Remote Desktop
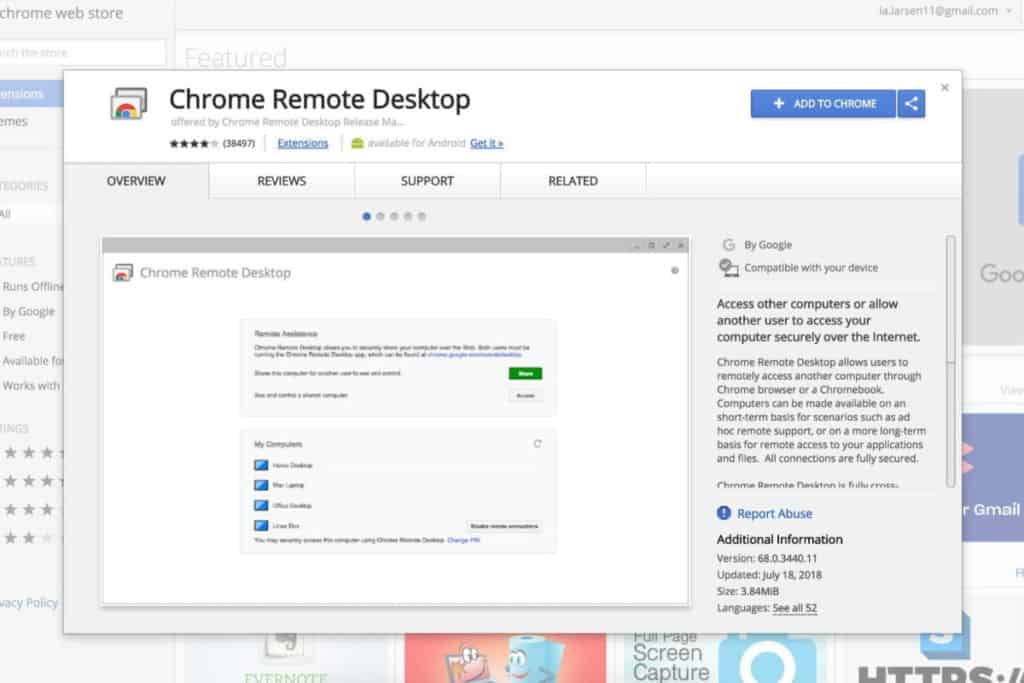
The Chrome Remote Desktop is an extension that simply allows you to access another desktop while using your Chromebook. Somewhat like a virtual machine, this will open a window that shows an entirely different operating system that you can use. The key to this method — and the caveat — is that you need another Windows 10 machine connected to the internet that you can link to. That’s the only way this works. Obviously, this won’t be possible in some Chromebook situations, but if you have a Windows computer around, this can be an effective workaround.
Step 1: Navigate over to the Chrome Web Store and download the Chrome Remote Desktop extension on your Chromebook. Then head over to your Windows computer, pull up your Chrome browser, and make sure it’s updated with the same capability.
Step 2: Starting on your Windows computer, head over to your Chrome apps and select Chrome Remote Desktop, then choose Get Started. From here, choose Share. This will create an access code and ask you to define the computer you want to connect to. Email that code to yourself so that you will remember it.
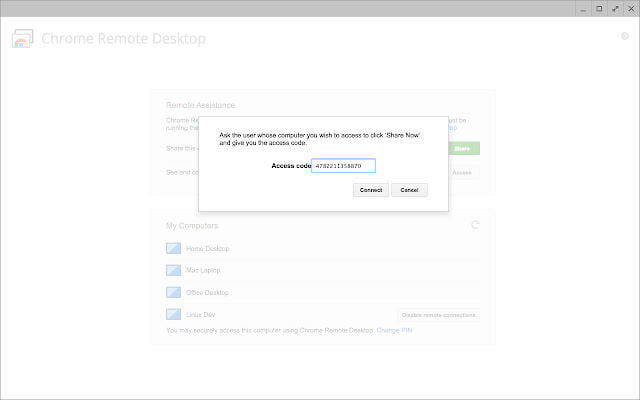
Step 3: Now switch to your Chromebook. Start the Chrome Remote Desktop — this time it should see your Windows computer as an option to select and connect to. Select it, and input the access code that you sent yourself. Then click Connect.
Note: This is a very good remote desktop app, but remote desktop solutions still have their pitfalls. They are highly dependent on internet connections and can experience delays at times. This works best if you have high-speed internet all the way between your computers.
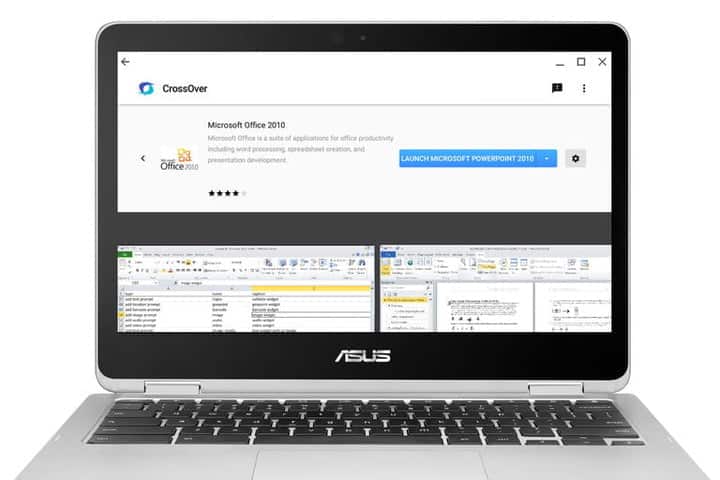
Method 3: CrossOver
Wer Windows-Anwendungen unter Chrome OS nutzen möchte, dem kann CrossOver helfen. Stellt Euch vor, Ihr könnt Eure Unternehmensanwendungen, die nur für Windows verfügbar sind, oder Programme wie Photoshop auf einem Laptop mit einem sicheren Betriebssystem verwenden.
Aber halt. Bevor Ihr jetzt direkt kommentiert – ich nin mir bewusst, dass es für die meisten Anwendungen kostenlose Alternativen gibt. Open-Source-Programm oder auch webbasierte Lösungen. Für manche Software ist das aber nicht der Fall und hier kommt CrossOver von CodeWeavers ins Spiel.
In meinem Fall habe ich CrossOver auf einem Google Pixelbook mit Intel Core i5 CPU und 8 GByte RAM ausprobiert. Kompatibel sind aber alle Chromebooks mit Intel CPU, 2 GByte RAM und 200 MByte freiem Speicherplatz.
Installation von CrossOver auf Chrome OS
Bevor Ihr Windows-Software auf Eurem Chromebook verwenden könnt, müsst Ihr natürlich CrossOver installieren. Ihr könnt die Software einfach aus dem Play Store herunterladen.
Installation eines unterstützten Programms
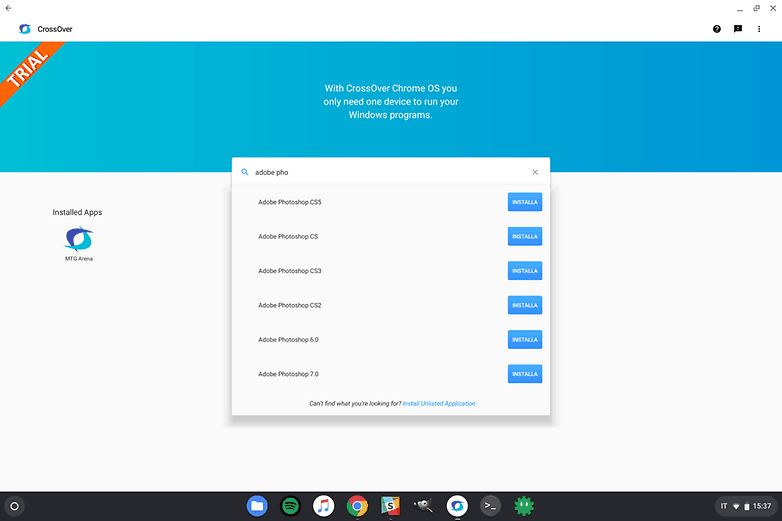
Bei der Konfiguration der App und der Installation von Bibliotheken und anderen Abhängigkeiten lässt CrossOver Euch nicht alleine. Zumindest nicht, wenn das Programm von CrossOver unterstützt wird. Mehr als 13.000 Programme mit ihren Konfigurationen finden sich in der CrossOver-Datenbank.
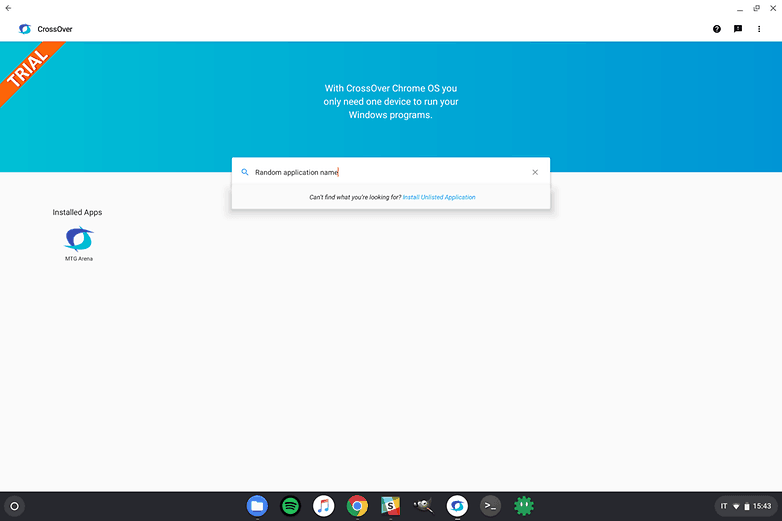
Um zu überprüfen, ob sich das zu installierende Programm in der Liste der bekannten Anwendungen befindet, gebt einfach den Namen in das Suchfeld ein. Ein Dropdown-Menü zeigt Vorschläge, zum Starten müsst Ihr nur auf den richtigen Namen klicken.
Die App fordert Euch auf, die Windows-Installationsdatei (in der Regel mit der Erweiterung .exe) des Programms auszuwählen, konfiguriert automatisch eine für den Betrieb geeignete virtuelle Umgebung und führt Euch durch die Installation aller für den Betrieb notwendigen Funktionen. Für einige Programme weiß CrossOver bereits automatisch, wo Ihr die Installationsdatei herunterladen könnt.
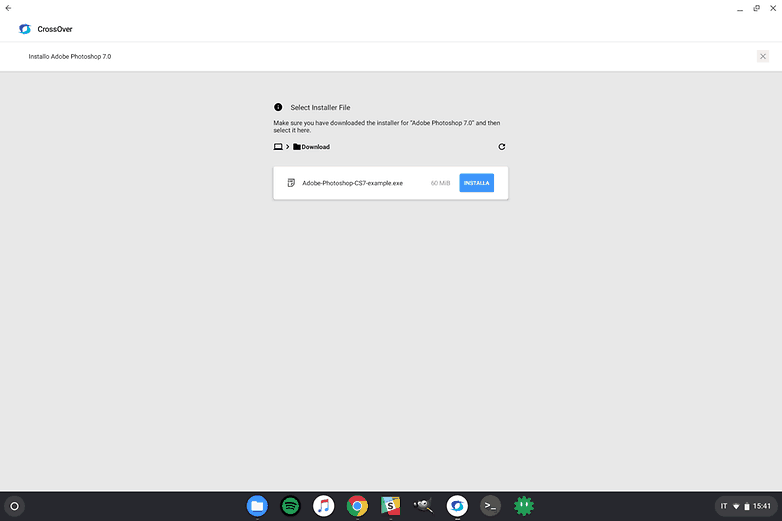
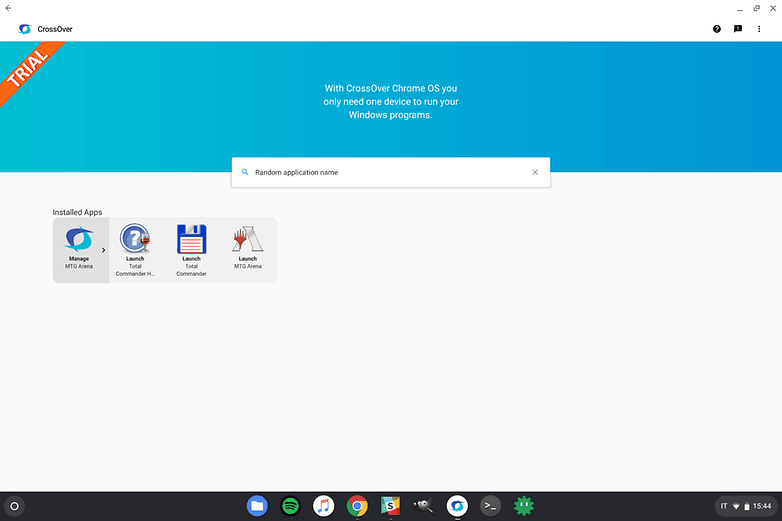
Jetzt müsst Ihr nur noch die klassische Installation wie auf einem echten Windows-PC durchführen. Nach der Installation könnt Ihr es über die erstellte Verknüpfung starten.
Installation eines unbekannten Programms
Wenn das Programm, das Ihr installieren möchtet, nicht in der Liste der kompatiblen Programme aufgeführt ist, könnt Ihr im Menü auswählen, eine unbekannte Anwendung einzurichten.
Warnung: Wenn das Programm CrossOver unbekannt ist, funktioniert es möglicherweise nicht richtig oder Ihr müsst die für die Ausführung erforderliche Konfiguration manuell erstellen!
Ihr werdet dann aufgefordert, den Namen für das Programm einzugeben und die Installationsdatei auszuwählen. Es wird auf dem Bildschirm der übliche Windows-Assistent für die Installation des gewählten Programms angezeigt, bei CrossOver findet Ihr dann ein neues Symbol, von dem aus Ihr es starten können.
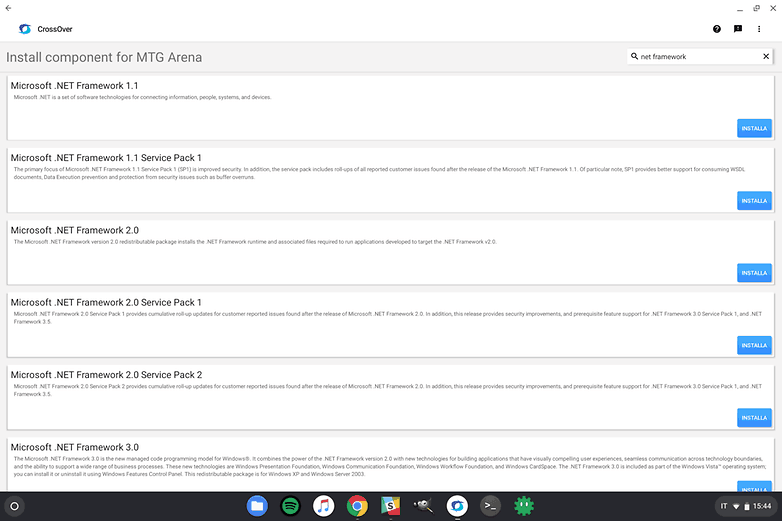
Installation zusätzlicher Bibliotheken und Komponenten
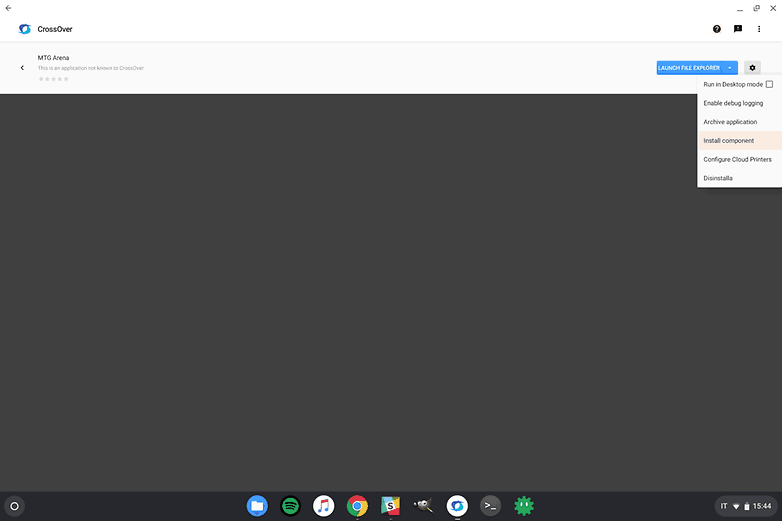
Wenn eine Software zusätzliche Bibliotheken wie das .NET-Framework braucht, könnt Ihr sie später einrichten oder zusammen mit dem Hauptprogramm installieren. Um neue Software in der gleichen Umgebung zu installieren, die bereits erstellt wurde, klickt auf das Symbol des installierten Programms und dann wieder „Manage [Programm-Name]“.
Klickt dann auf das Zahnrad und dann auf „Komponente installieren“. Dann wählt Ihr das gewünschte Programm wieder aus und startet die Installation.
In der Programmverwaltung könnt Ihr Wine auch weiter konfigurieren. Das empfiehlt sich aber nur, wenn Ihr wisst, was Ihr tut.