- Switch to the Professional (2) workspace so every control is visible. Radiant’s workspaces are designed to show complete tool groups and you can toggle among them quickly with number keys 1–0.
- Radiant’s adjustments are live and fully non-destructive, so you can revisit any slider at any time.
- Use the Histogram and clipping indicators (press J) to keep highlights/shadows in check as you push contrast.
- Start better with a scene aware preset to get rid of color casts and perfectly balance skin tones and exposure.
- Change your views as needed to use options like Split View and Before/After View to track your editing progress.

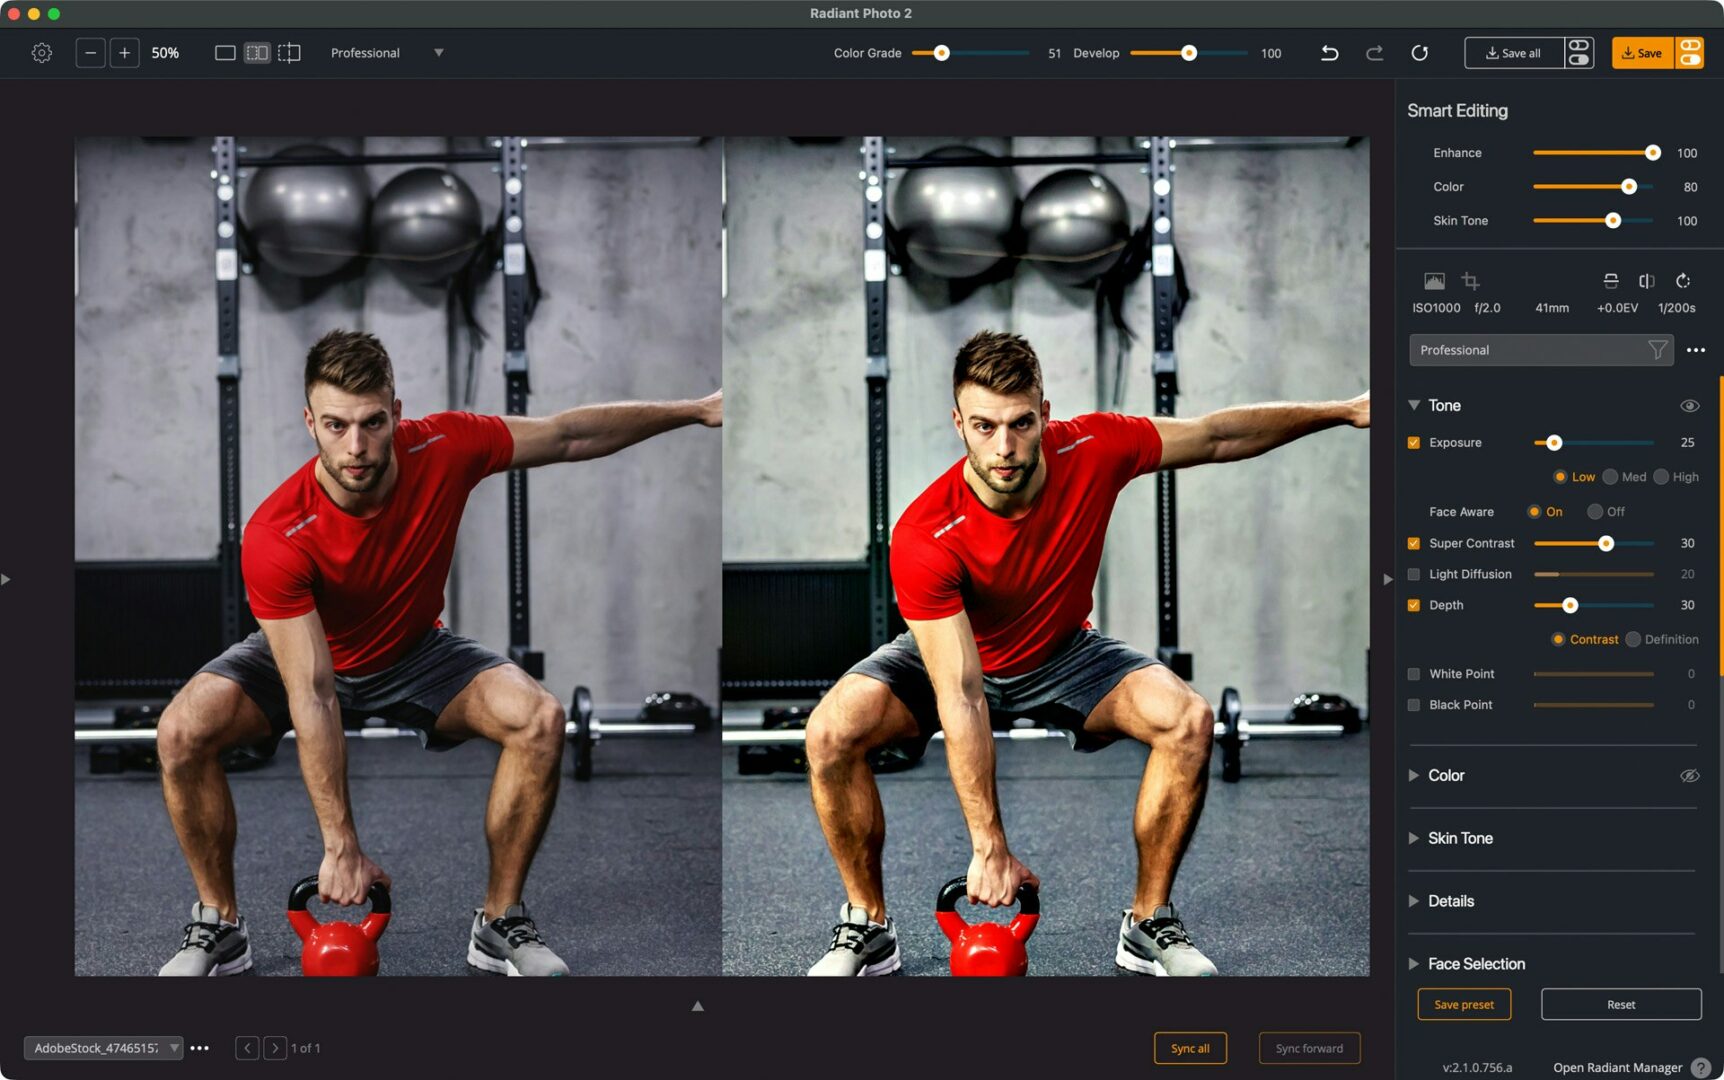
1) Super Contrast — instant “pop”
Open Tone → Super Contrast and add a controlled punch to lift midtone separation and texture in the shirt, arms, and rubber floor. Super Contrast is designed to add depth and pop and often makes images feel sharper—perfect when a scene looks a little flat.
How I dial it: start around 30–50. Watch skin highlights and the grey walls; if red areas get too aggressive, we’ll tame them later with Selective Color.
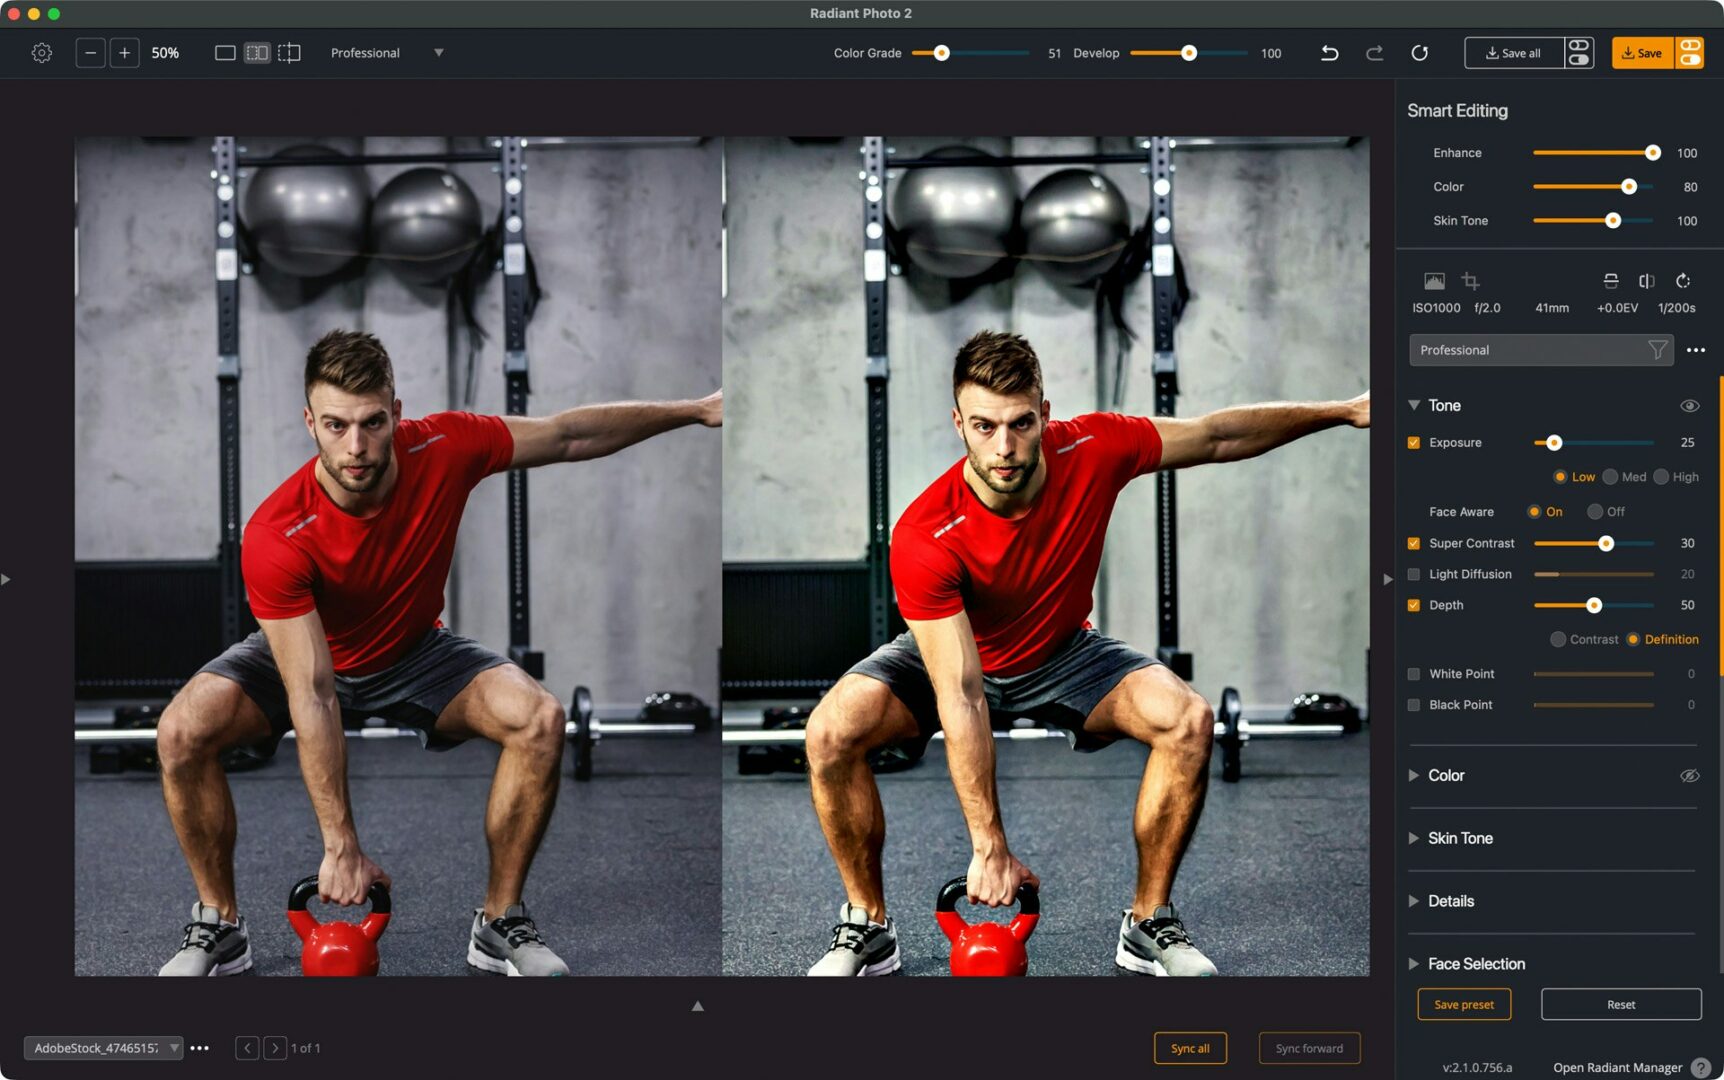
2) Depth — carve out 3-D clarity
Depth increases contrast per pixel for clearer detail and dimensionality. If the image darkens slightly, nudge Exposure afterwards.
How I dial it: set Depth: 50, and tried Definition variation for richer shadows. If the room was underexposed, keep Depth modest; for very dark files, consider backing it off (Depth can make dark scenes look darker).
3) Skin Tone — keep the athlete natural
Enable Smart Editing → Skin Tone for an optimized balance between skin and the background while removing color-cast issues. The Color Cast removal is the key to remove odd color casts from the mixed and poor quality light often found in gyms.
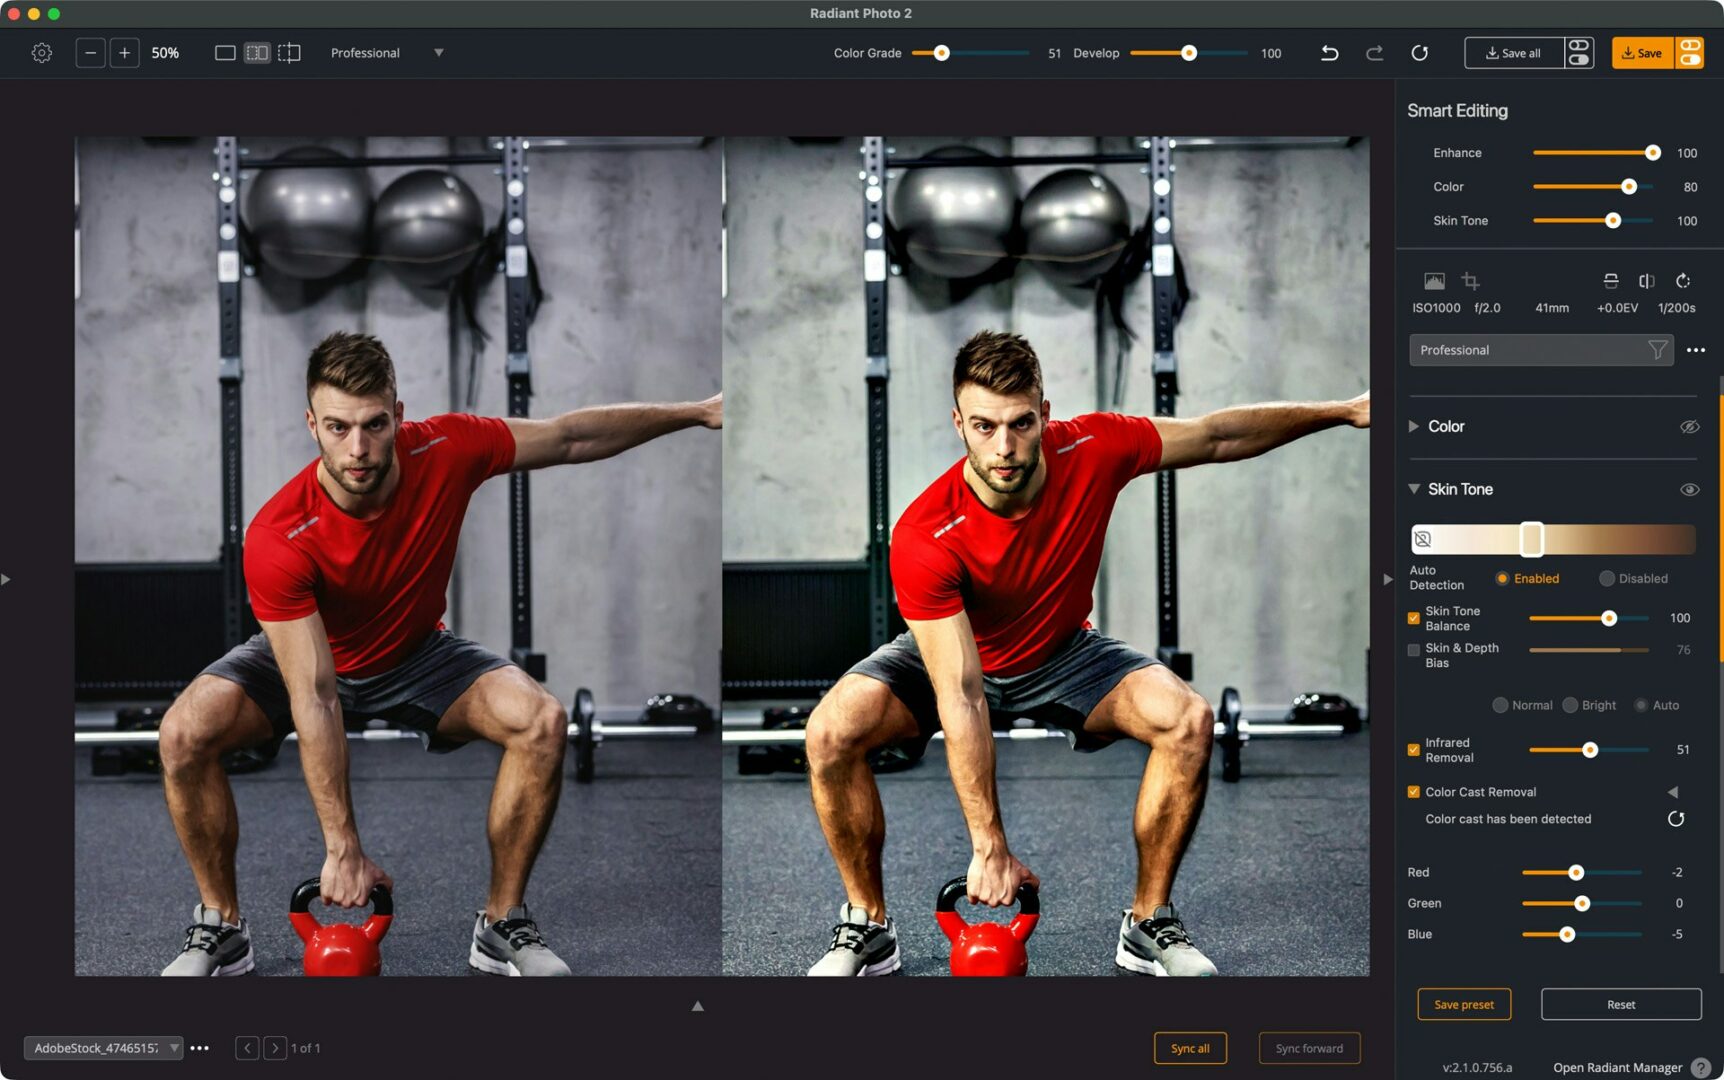
If sweat sheen is distracting, try Skin → Shine Removal in Portrait Tools to tone it down—handy with gym lighting.
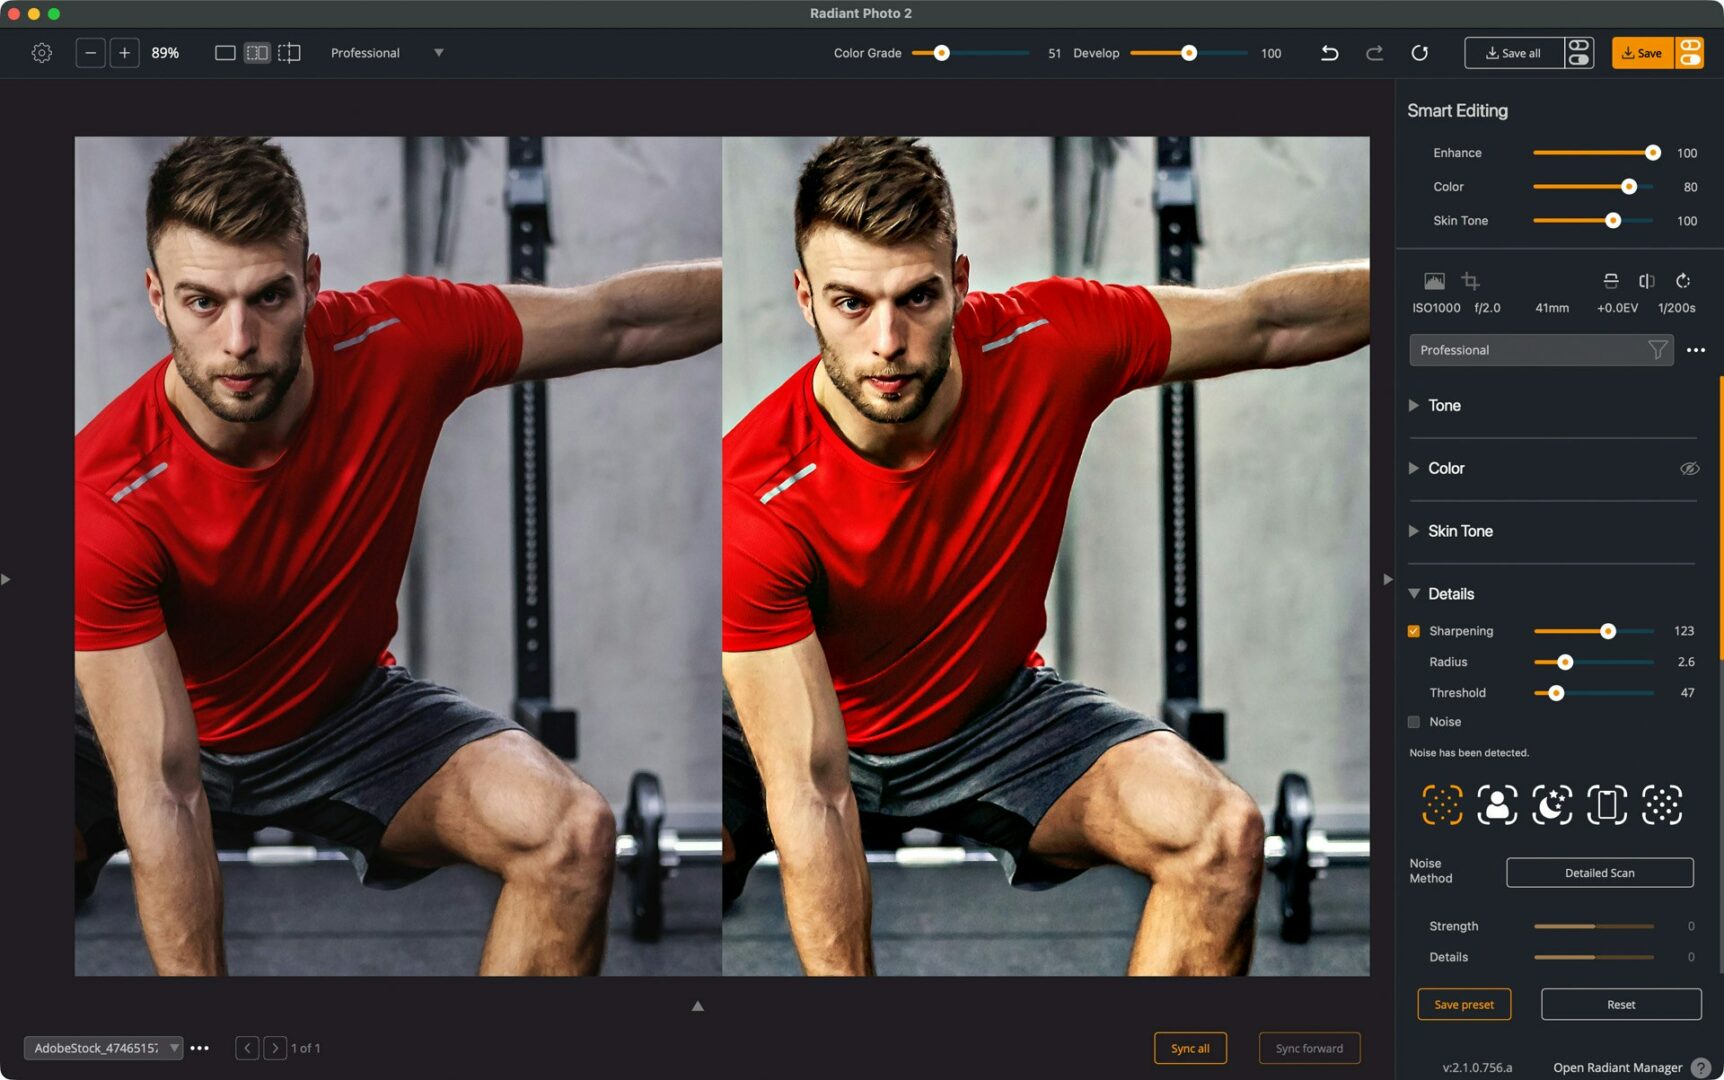
4) Sharpen — make grit look crisp
Jump to Details → Sharpening. Zoom to 100% and increase Amount until edges (beard, hair, kettlebell handle, shoe knit) are crisp without halos. If ISO noise shows, pair with a touch of Noise Reduction. (Sharpening and NR live under Details Tools.) Be sure to zoom to 100% to accurately judge sharpening
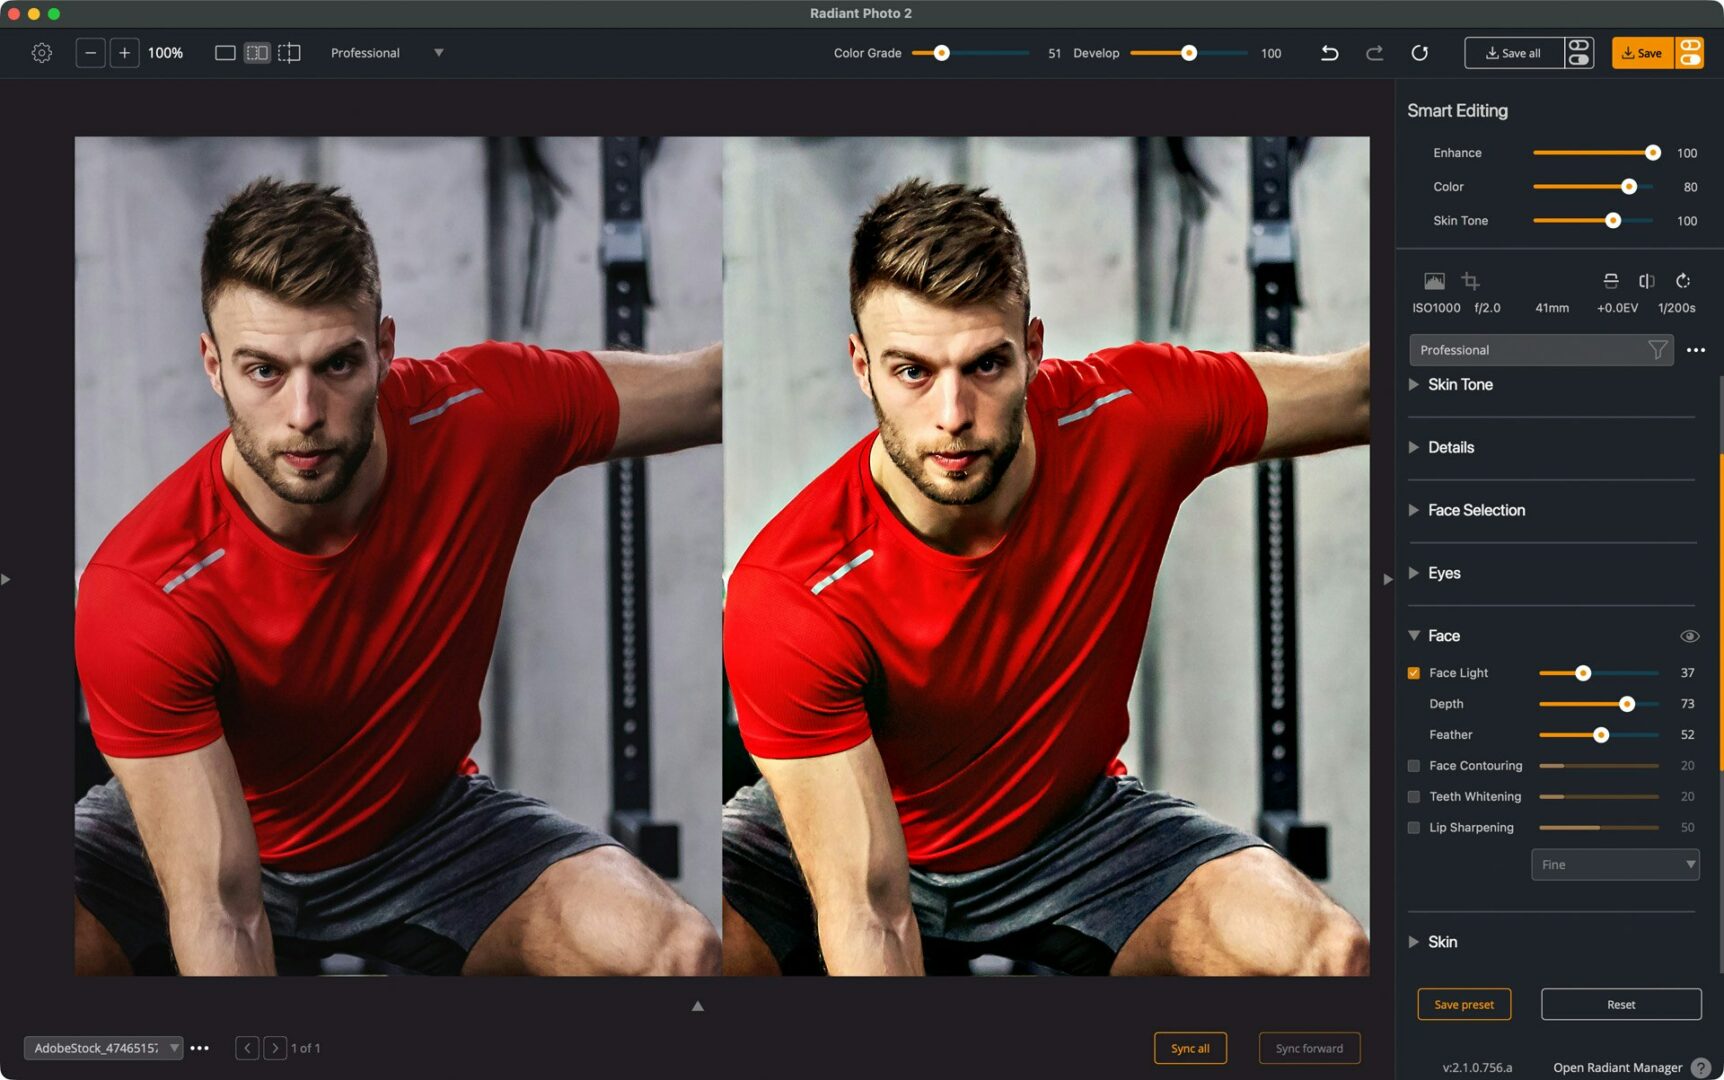
5) Face Light — fill in the shadows
A little extra light on the face can go a long way. Use all three controls to get the right balance of fill and shadows.
6) Color Grading — set the mood
Now the creative spice. In Color Grading, pick a Look that suits a gritty gym vibe, then balance with the Strength, Saturation, and Contrast sliders—these three are intentionally versatile for fine-tuning. Color Grading is a finishing step that remaps tone and color independently from other controls.
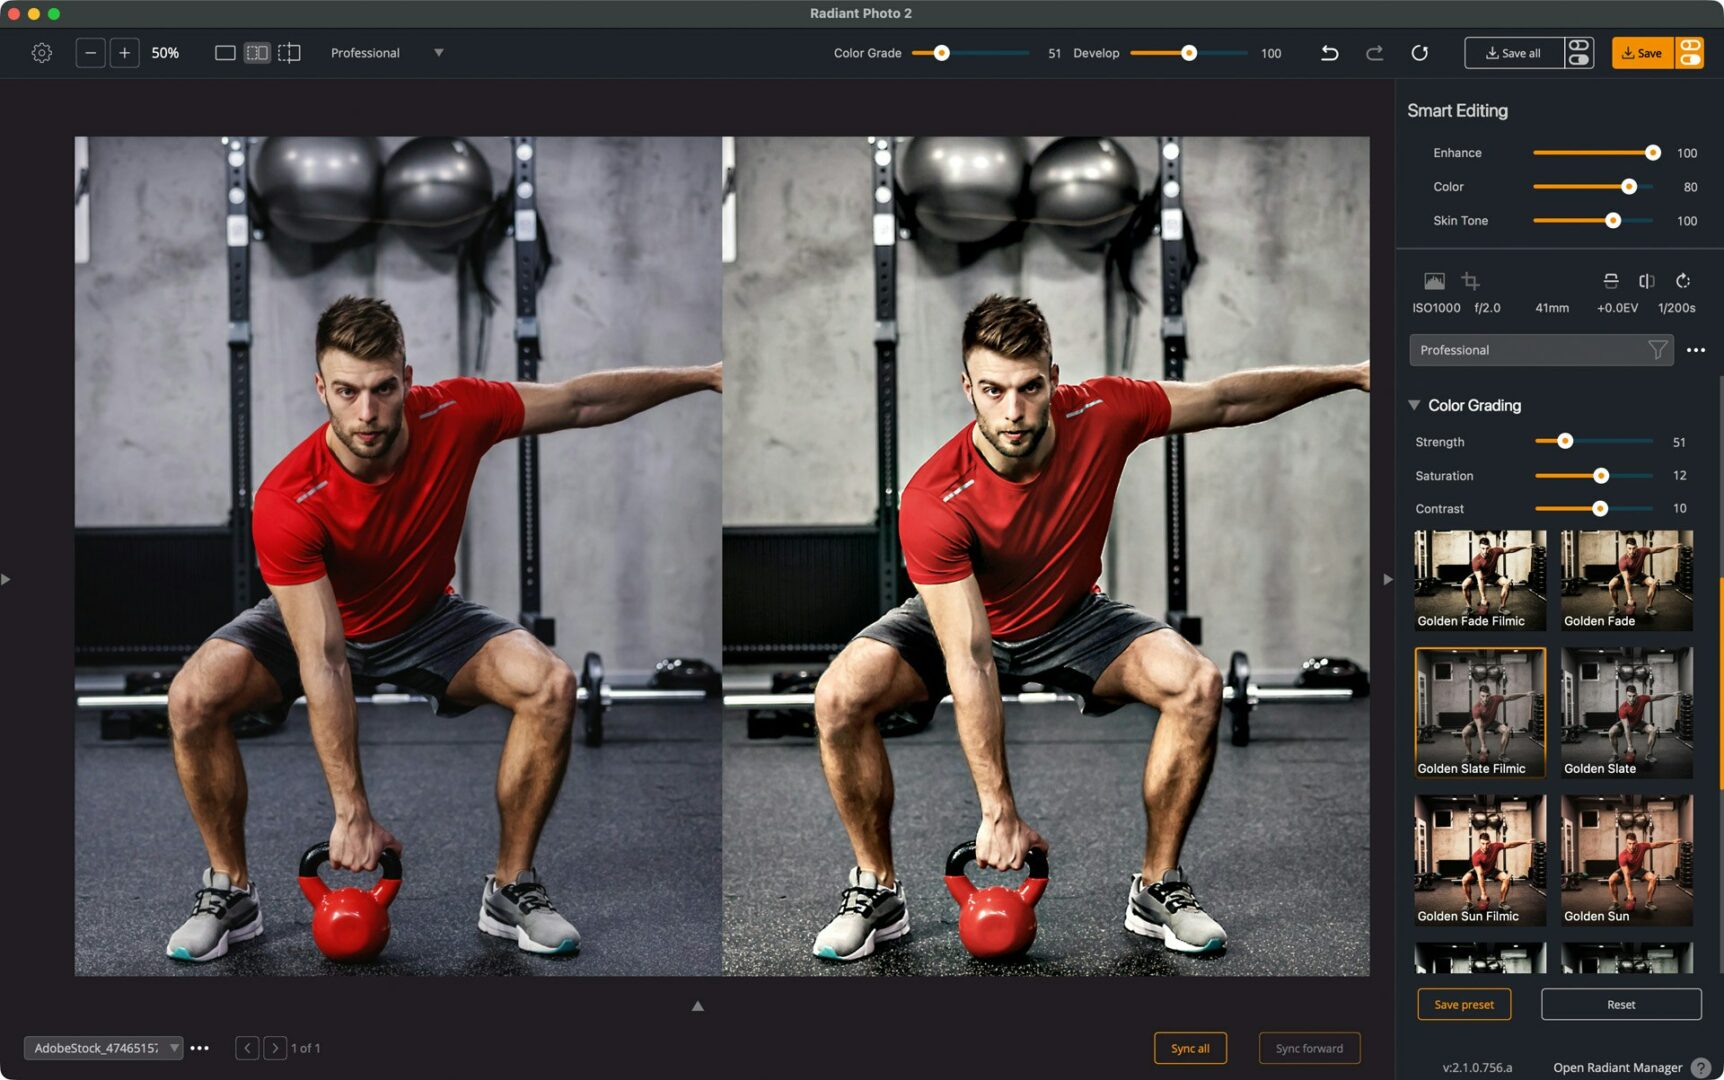
Suggestions: try a warmer, steely grade to push the colors and tones. We’re using the expansive Rock Posters Looks Pack here;
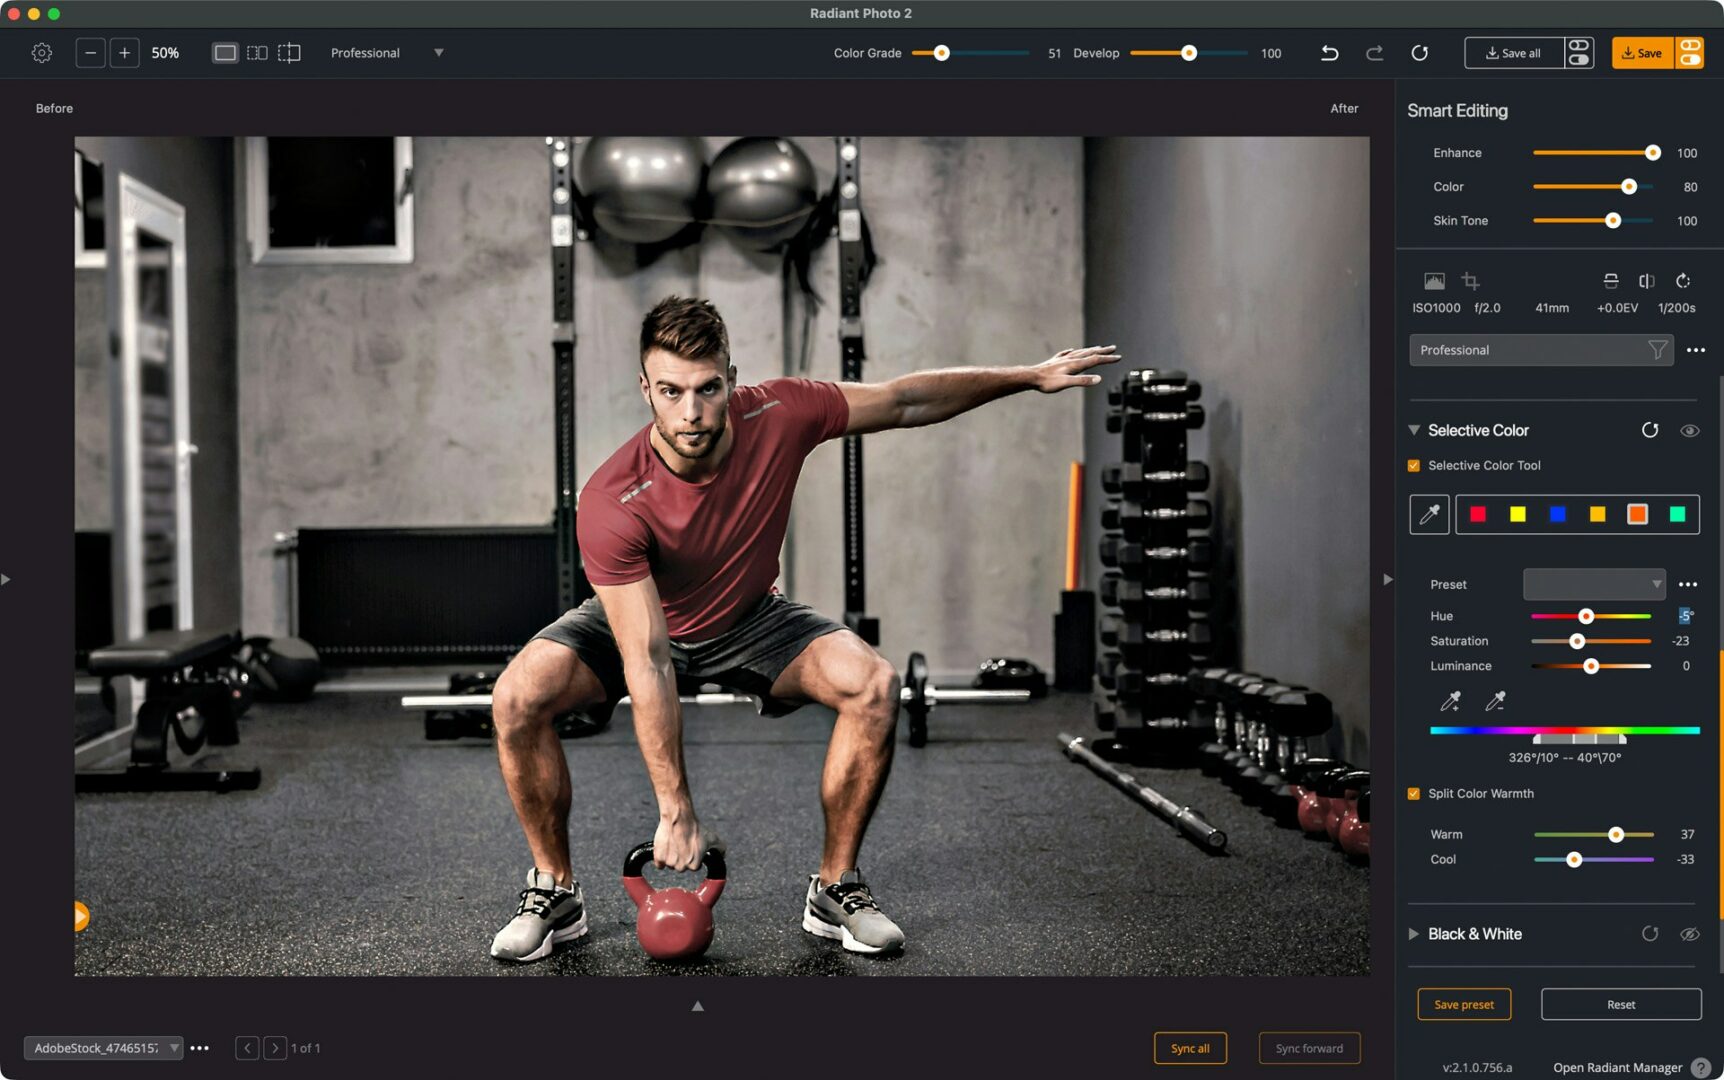
7) Selective Color — control the red + cool the room
Use Selective Color Tools → Selective Color. Click the Eyedropper and sample the red shirt/kettlebell. Then adjust Hue/Saturation/Luminance only for that target—this tool is built specifically for transforming a chosen color without painting masks.
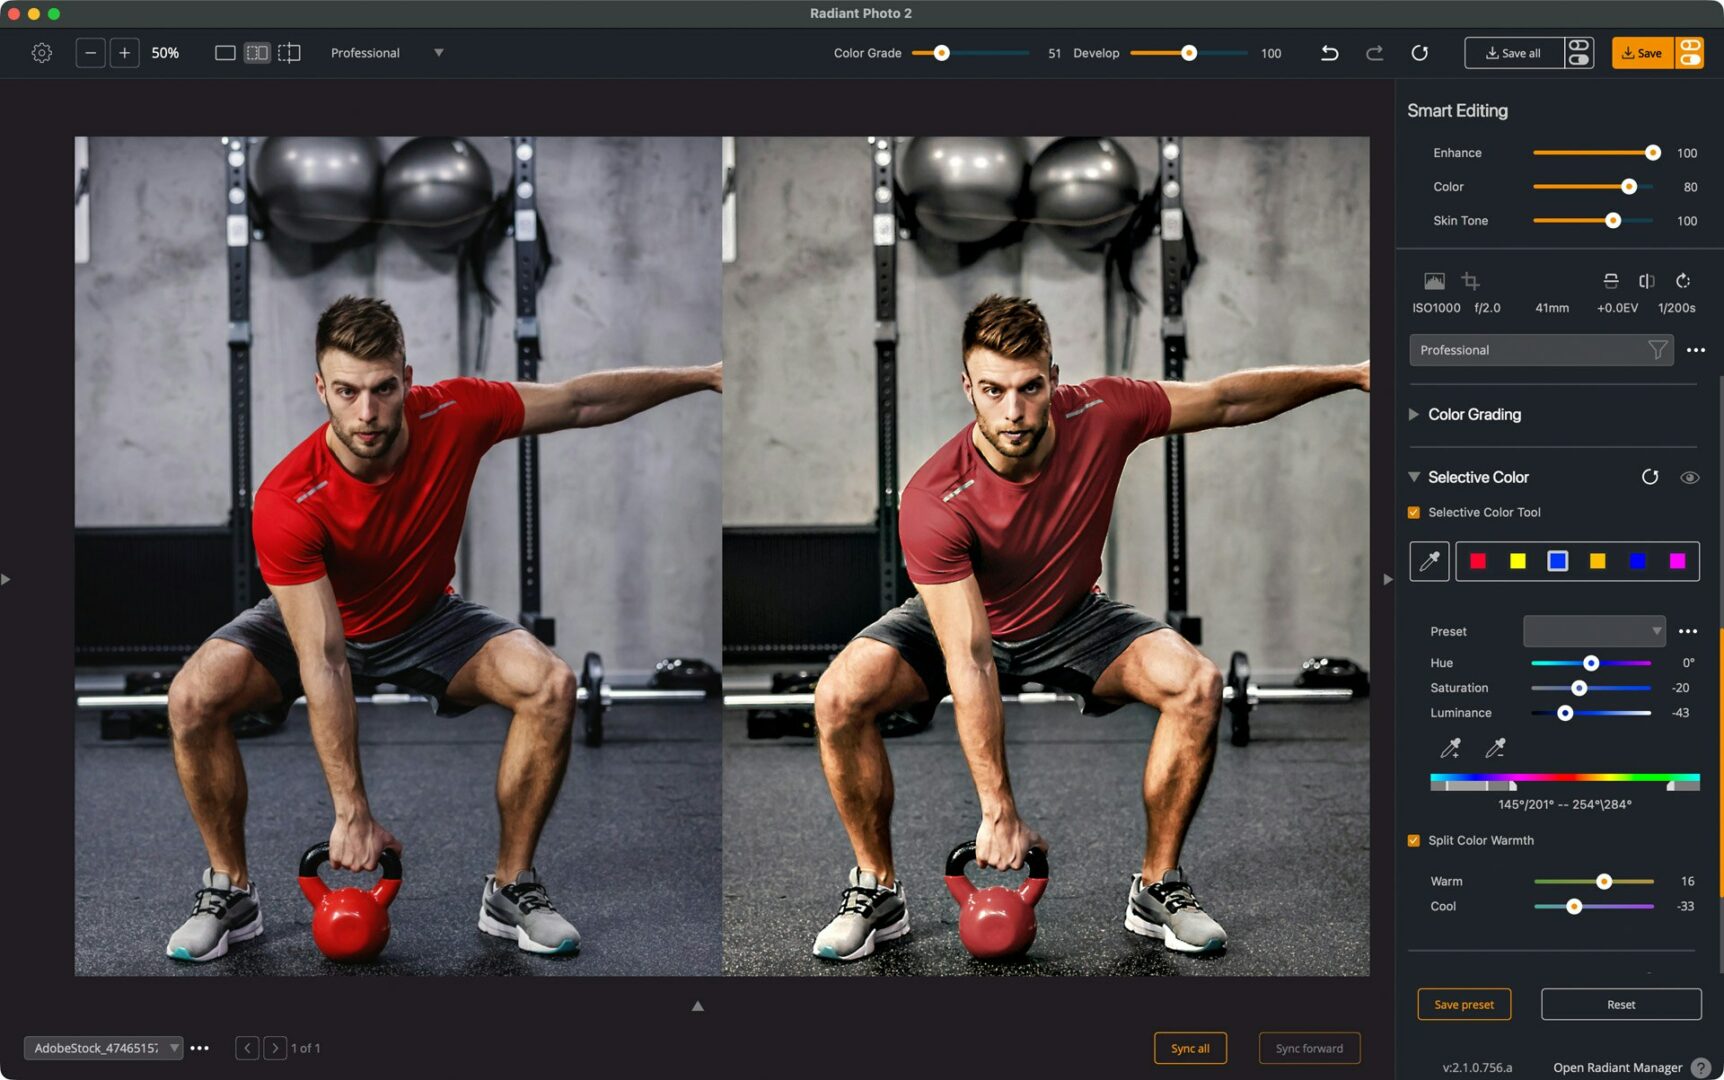
- If the reds are shouting, drop Saturation a touch and lower Luminance a few points for a deep, luxurious red.
- Next, target Greys/Blues in the background and desaturate slightly to push the subject forward. You can refine the selected hue range precisely using RAMP handles (Lowest/Highest Hue affected and feathering points).
- Want extra separation? Use Split Color Warmth to warm warm areas and cool cool areas—essentially a color-split tone for extra drama.
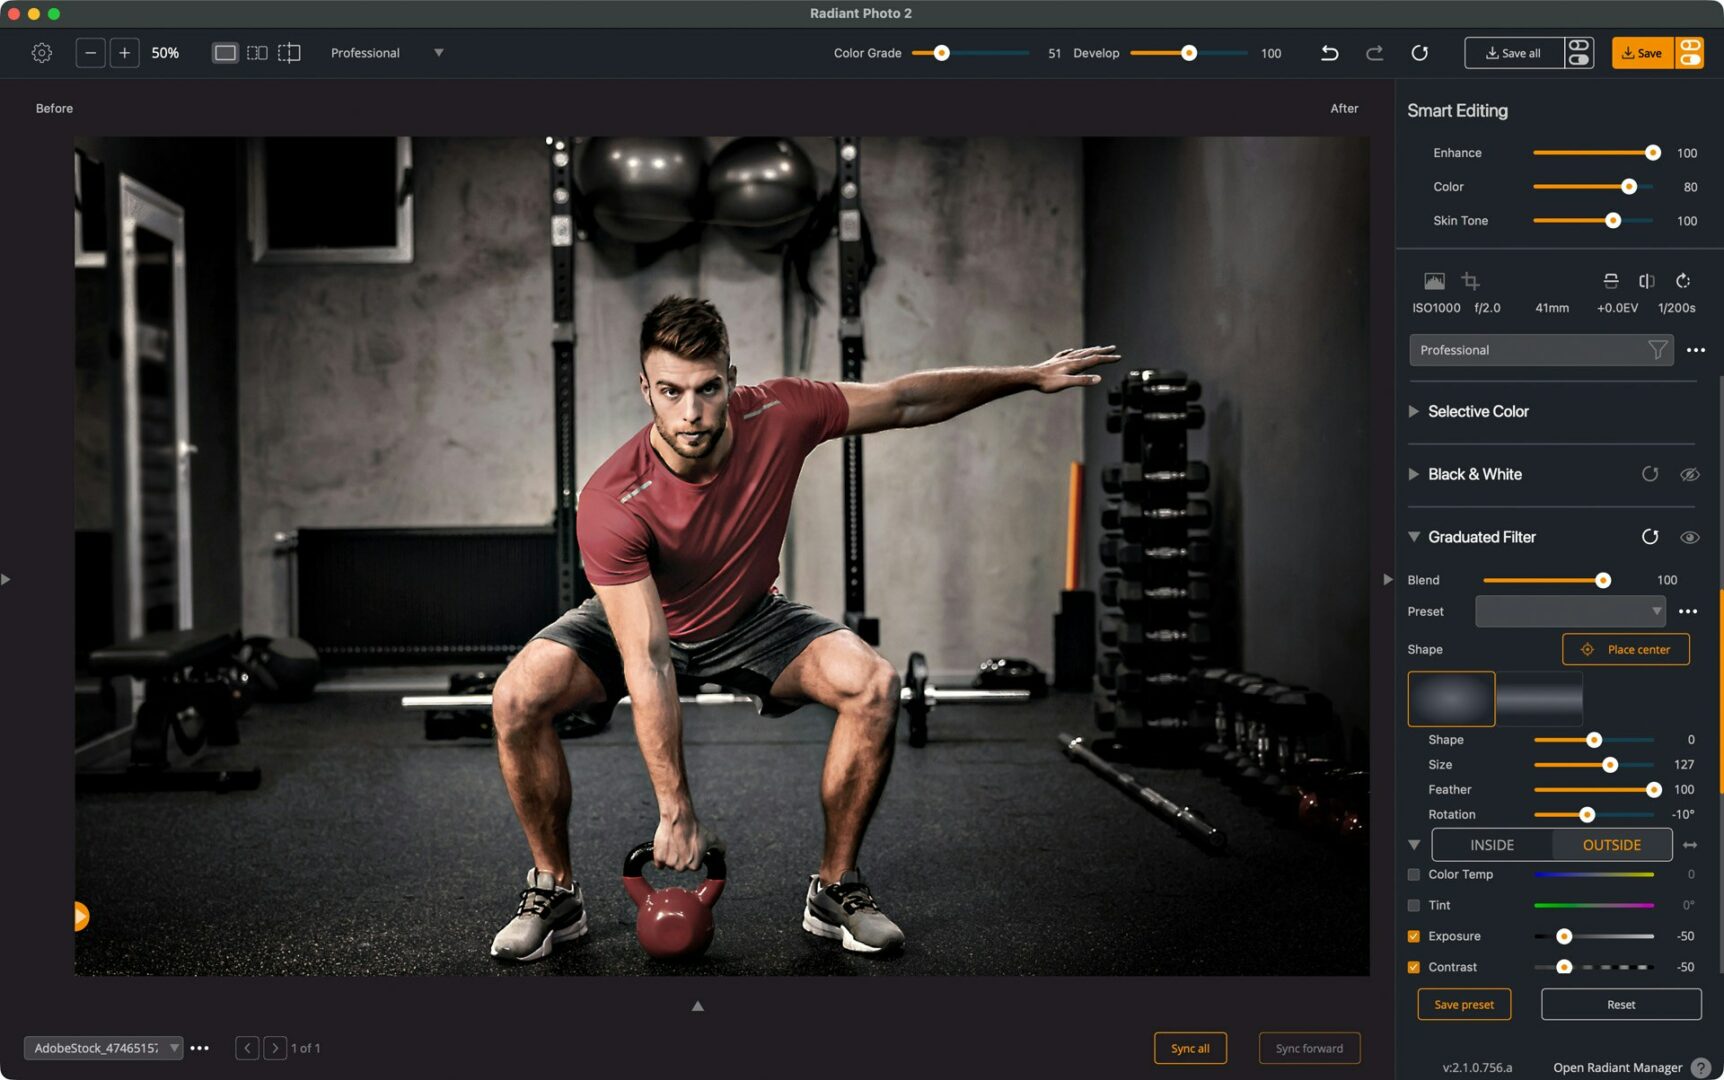
8) Graduated Filter — shape the light
Use Targeted Adjustment → Graduated Filter to guide the eye:
- Add a Radial gradient centered slightly above the sternum (Place Center) and Feather generously for a believable vignette; rotate to match the room’s top-light angle.
- Be sure to tweak the center point as well as the shape, rotation and feather to best frame the subject.

Inside/Outside (radial) or Top/Bottom (linear) let you set two different corrections—perfect for brightening the athlete while dimming the room.
Use the built-in Adjustments (Exposure/Contrast/Highlights/Shadows, etc.) right in the filter—same family as Finishing Tools—so you don’t have to leave the tool.
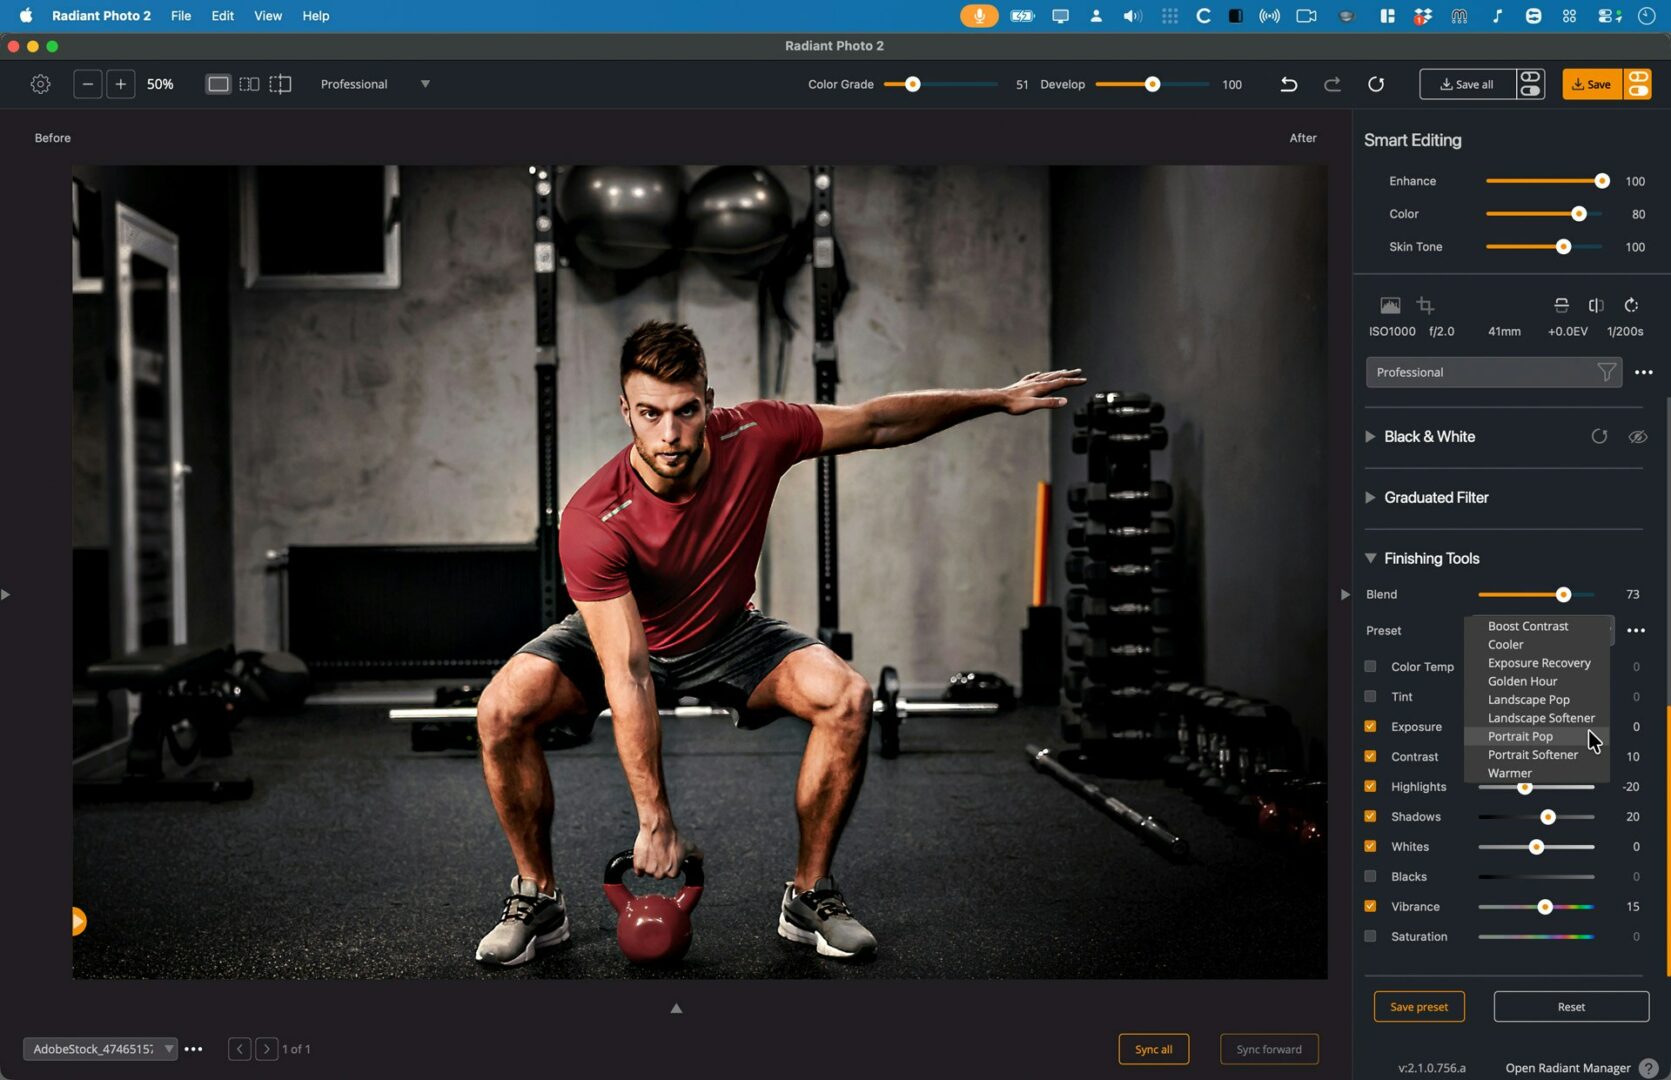
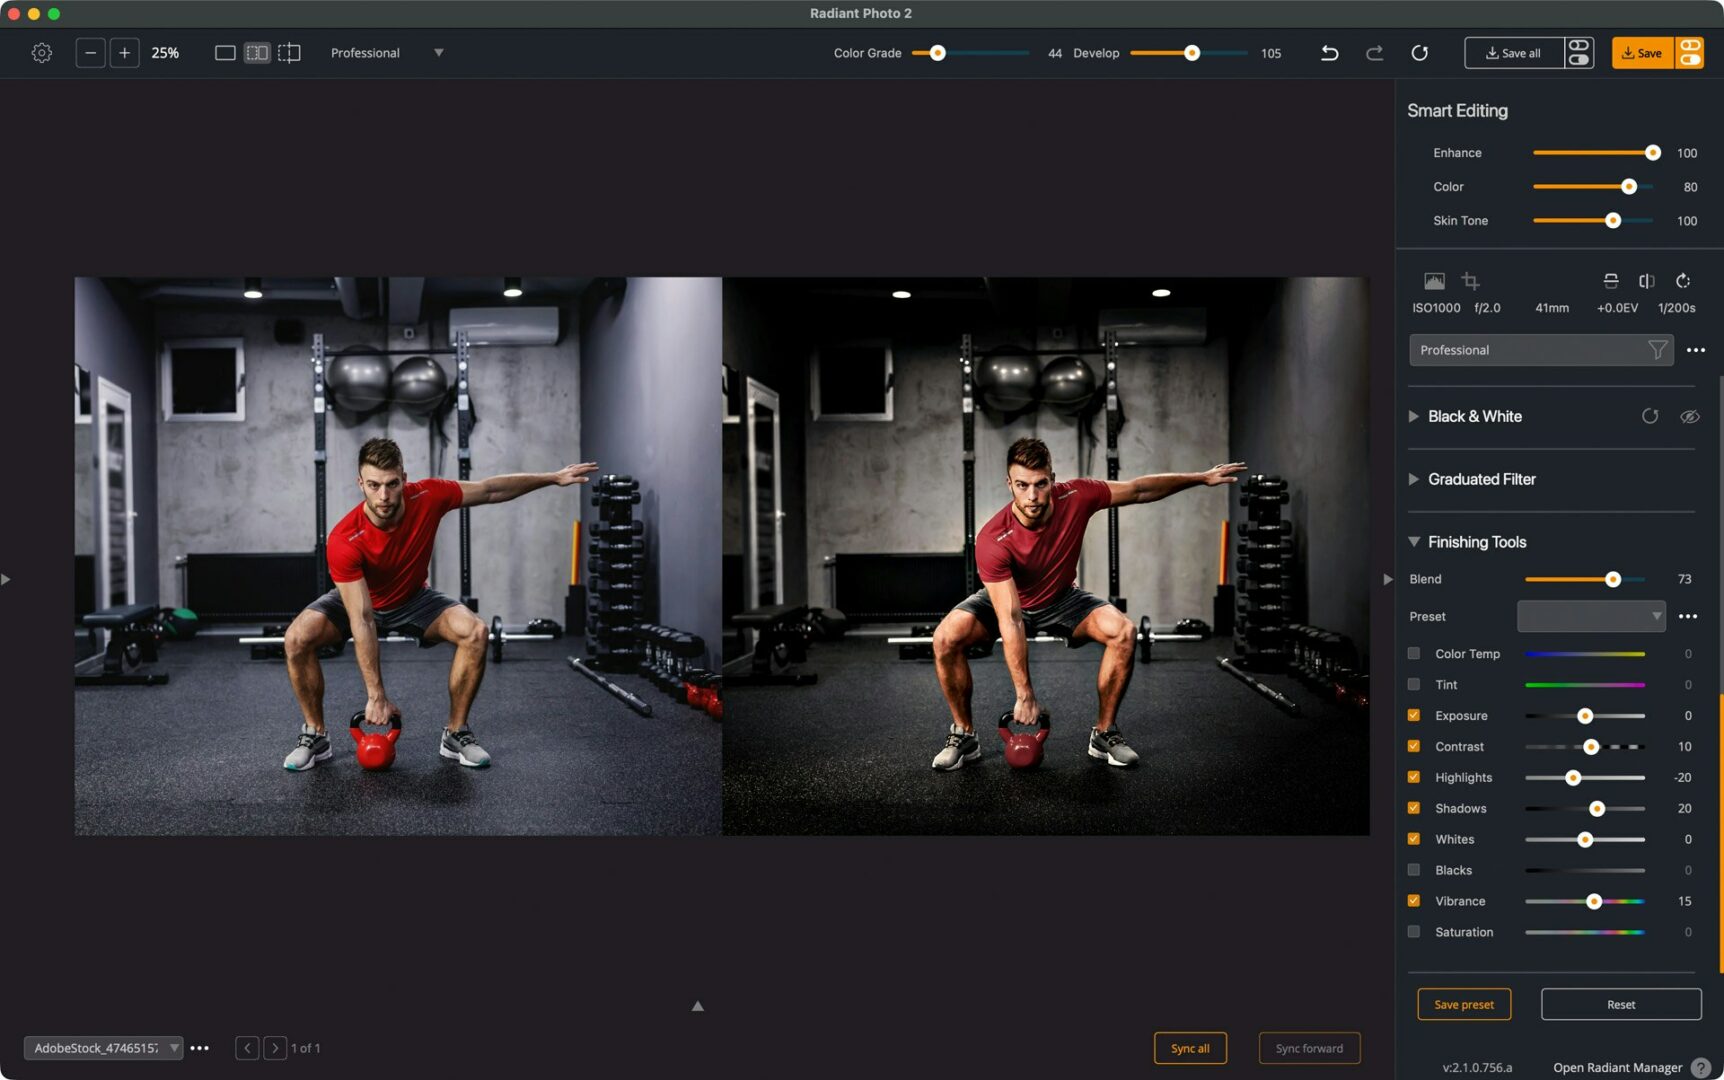
9) Finishing Tools — polish and protect
Wrap with Finishing Tools for the overall look. This group is intended for fine-tuning the photo’s final appearance and includes sharpening/noise cleanup and final color finishing—ideal for web- or print-ready output.
What to Watch For (and Fix Fast)
- Over-crispy skin: If pores start screaming after Super Contrast + Depth + Sharpen, back off Sharpen first, then nudge Super Contrast down.
- Too-dark overall after Depth: Add a little Exposure; Depth can lower overall brightness.
- Color shifts from heavy grading: Remember Color Grading is a finishing remap; reduce Strength/Saturation or revisit Selective Color to protect key hues.
- Be sure to save a custom preset for easy reuse.
- The Exponential sliders in the Top Bar are a great way to refine the look with quick controls.